
I’ve seen quite a few photographers over during my 11 years in the wedding photography industry refer to themselves as “natural light only”. I’ve also been in many venues where flash either wasn’t allowed (churches), or would’ve been disruptive for the couple and/or the guests for whatever reason. So, of course we have to be able to use natural light as best we can to get good documentary results at a wedding where you can’t repeat things. That is definitely the place to start, and to become extremely confident in first!
BUT…
…you can elevate your work beyond that.
I think a lot of photographers avoid flash because it sounds “technical”, and clients because it can be “disruptive”, although a more recent trend for direct flash editorial photos has somewhat tempered this. However, with the rise of content creators often taking photos of our setups and delivering them earlier than us… what can we do to stay relevant to couples, help them see the value to our services, and differentiate ourselves from content creators?

I firmly believe that learning flash can be a big step towards that.
In this article I’ll share examples to convince you to EMBRACE flash, either out of necessity or artistic preference for the quality of your photos – whether you’re a photographer or a client! Not all examples are from weddings, but all of them will illustrate a different point I’ll make. After the examples, I’ll explain the settings I use, too, as simply as I can!
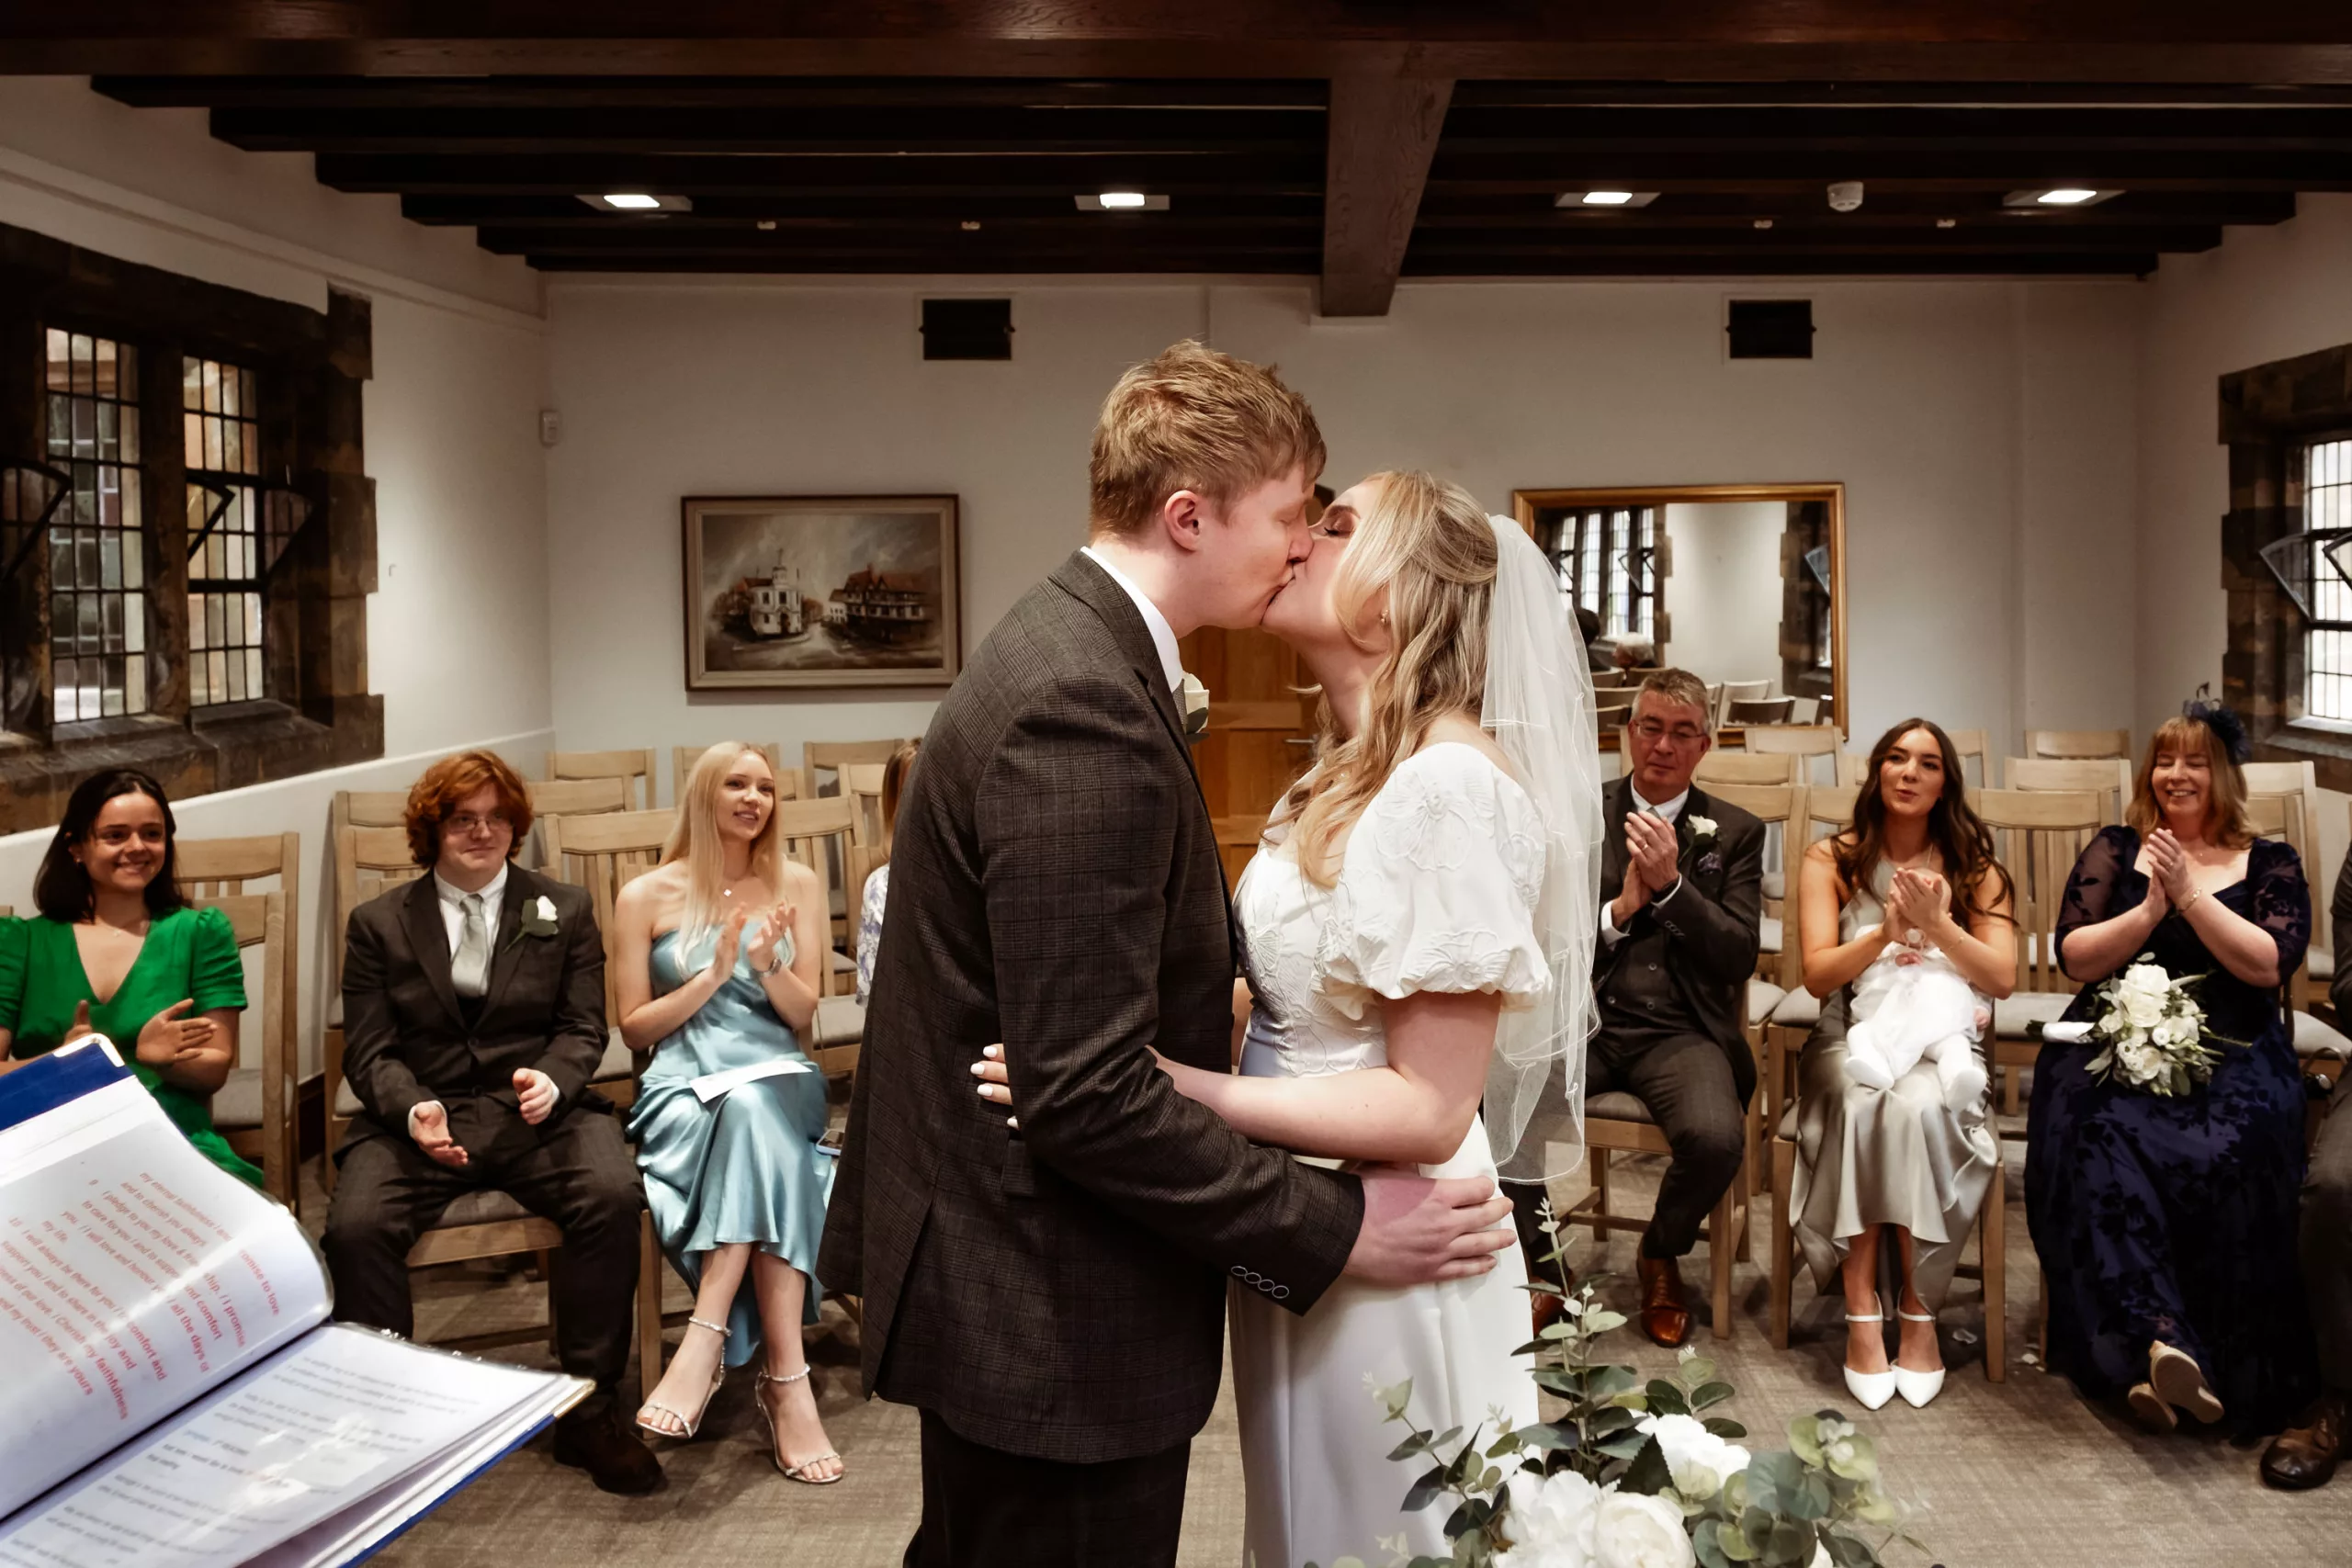
Example 1: Messy indoor light
The direction and quality of the light that hits the subject is very important! For flattering portraits, you want it to hit them from the front, nice and even, to sculpt their face in the best possible way. In many rooms, light will be coming from the windows AND random lights in the room, that could be in all sorts of directions. Chances are, the light hitting the subject’s face is going to be kind of messy. It’s not awful, and with good editing it can be saved to an acceptable standard, but if we can do better for certain posed photos – why not?
Check out this example, two photos shot within seconds of each other. First one is natural light, the second has added flash on the camera.
Notice the difference the flash makes to the shadows on everyone’s face, the sparkle in their eyes and the overall “cleanness” of the photo. Using the flash also meant I could keep a bit more detail in the background because I didn’t have to ensure their faces were bright enough to match – the flash did that for me!
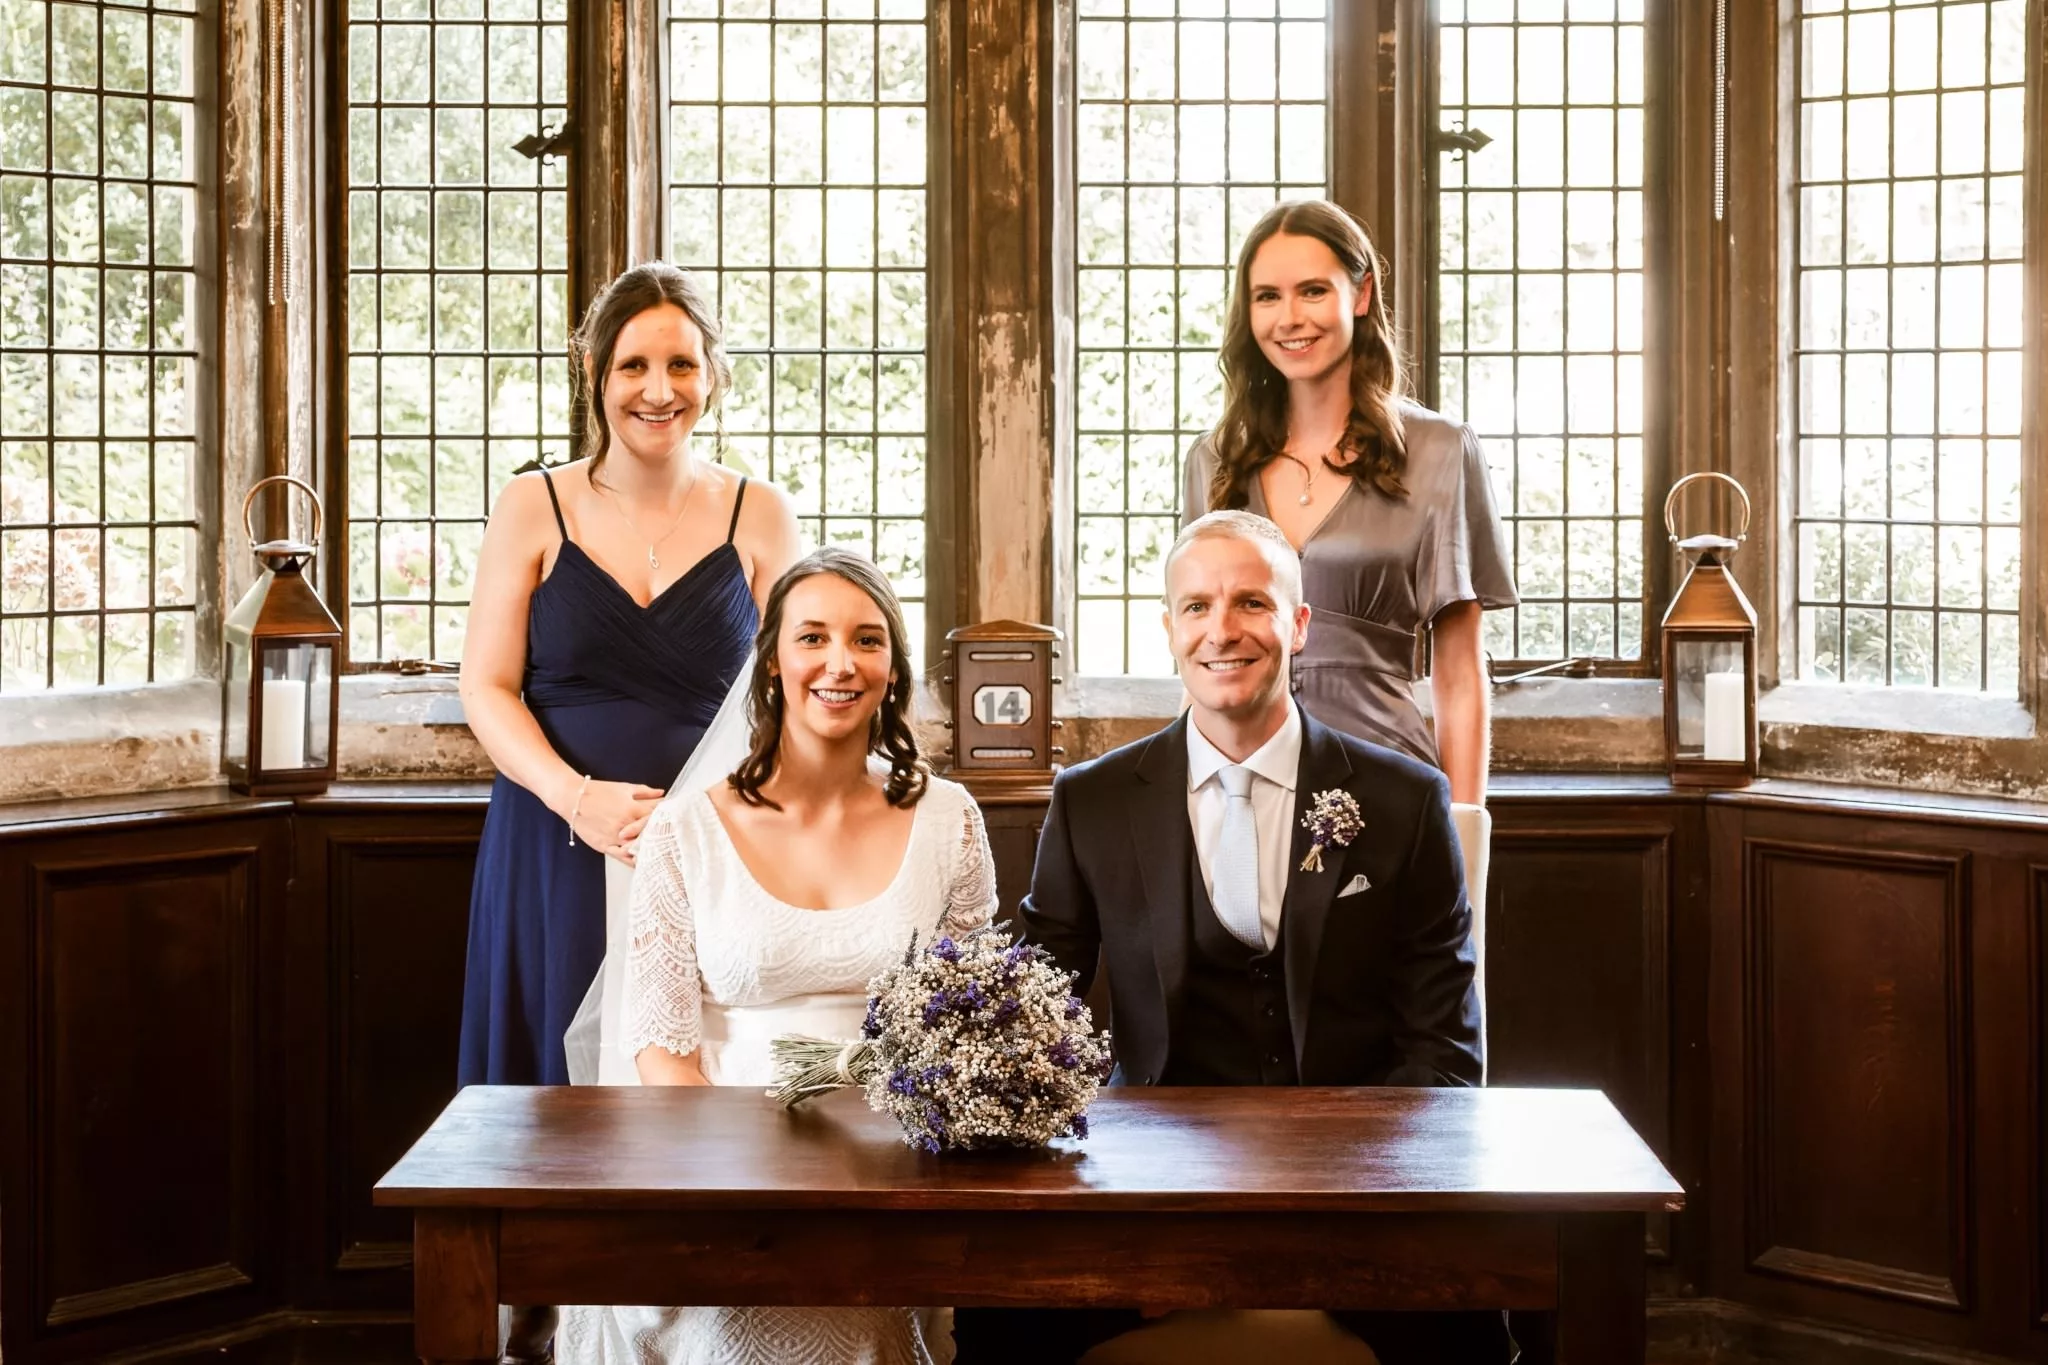
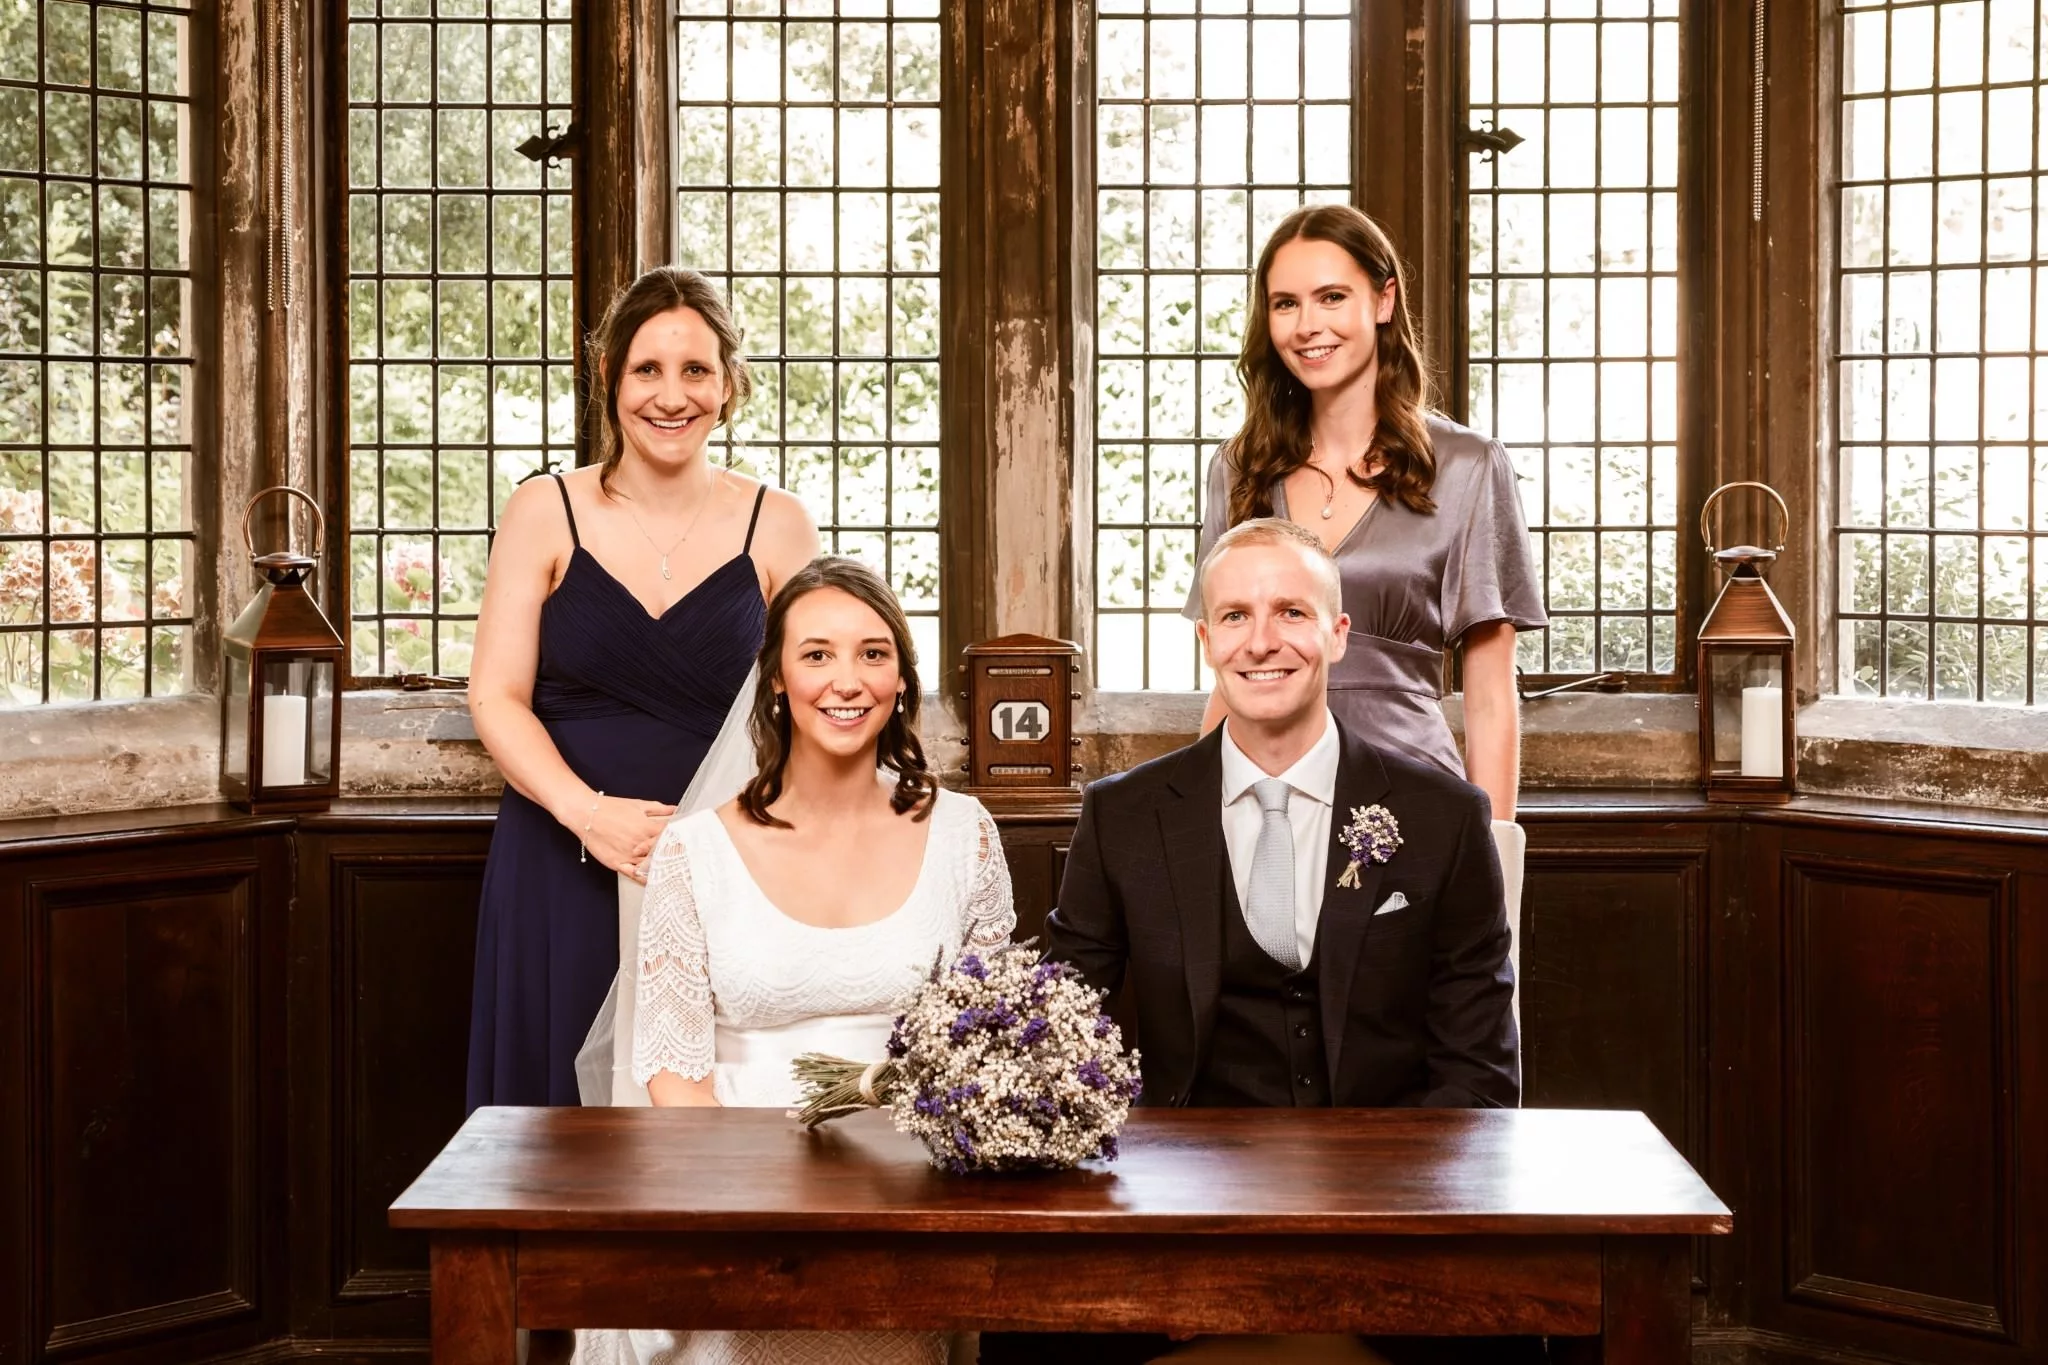
The same thing applies in any room where lighting is like that (like many register offices).
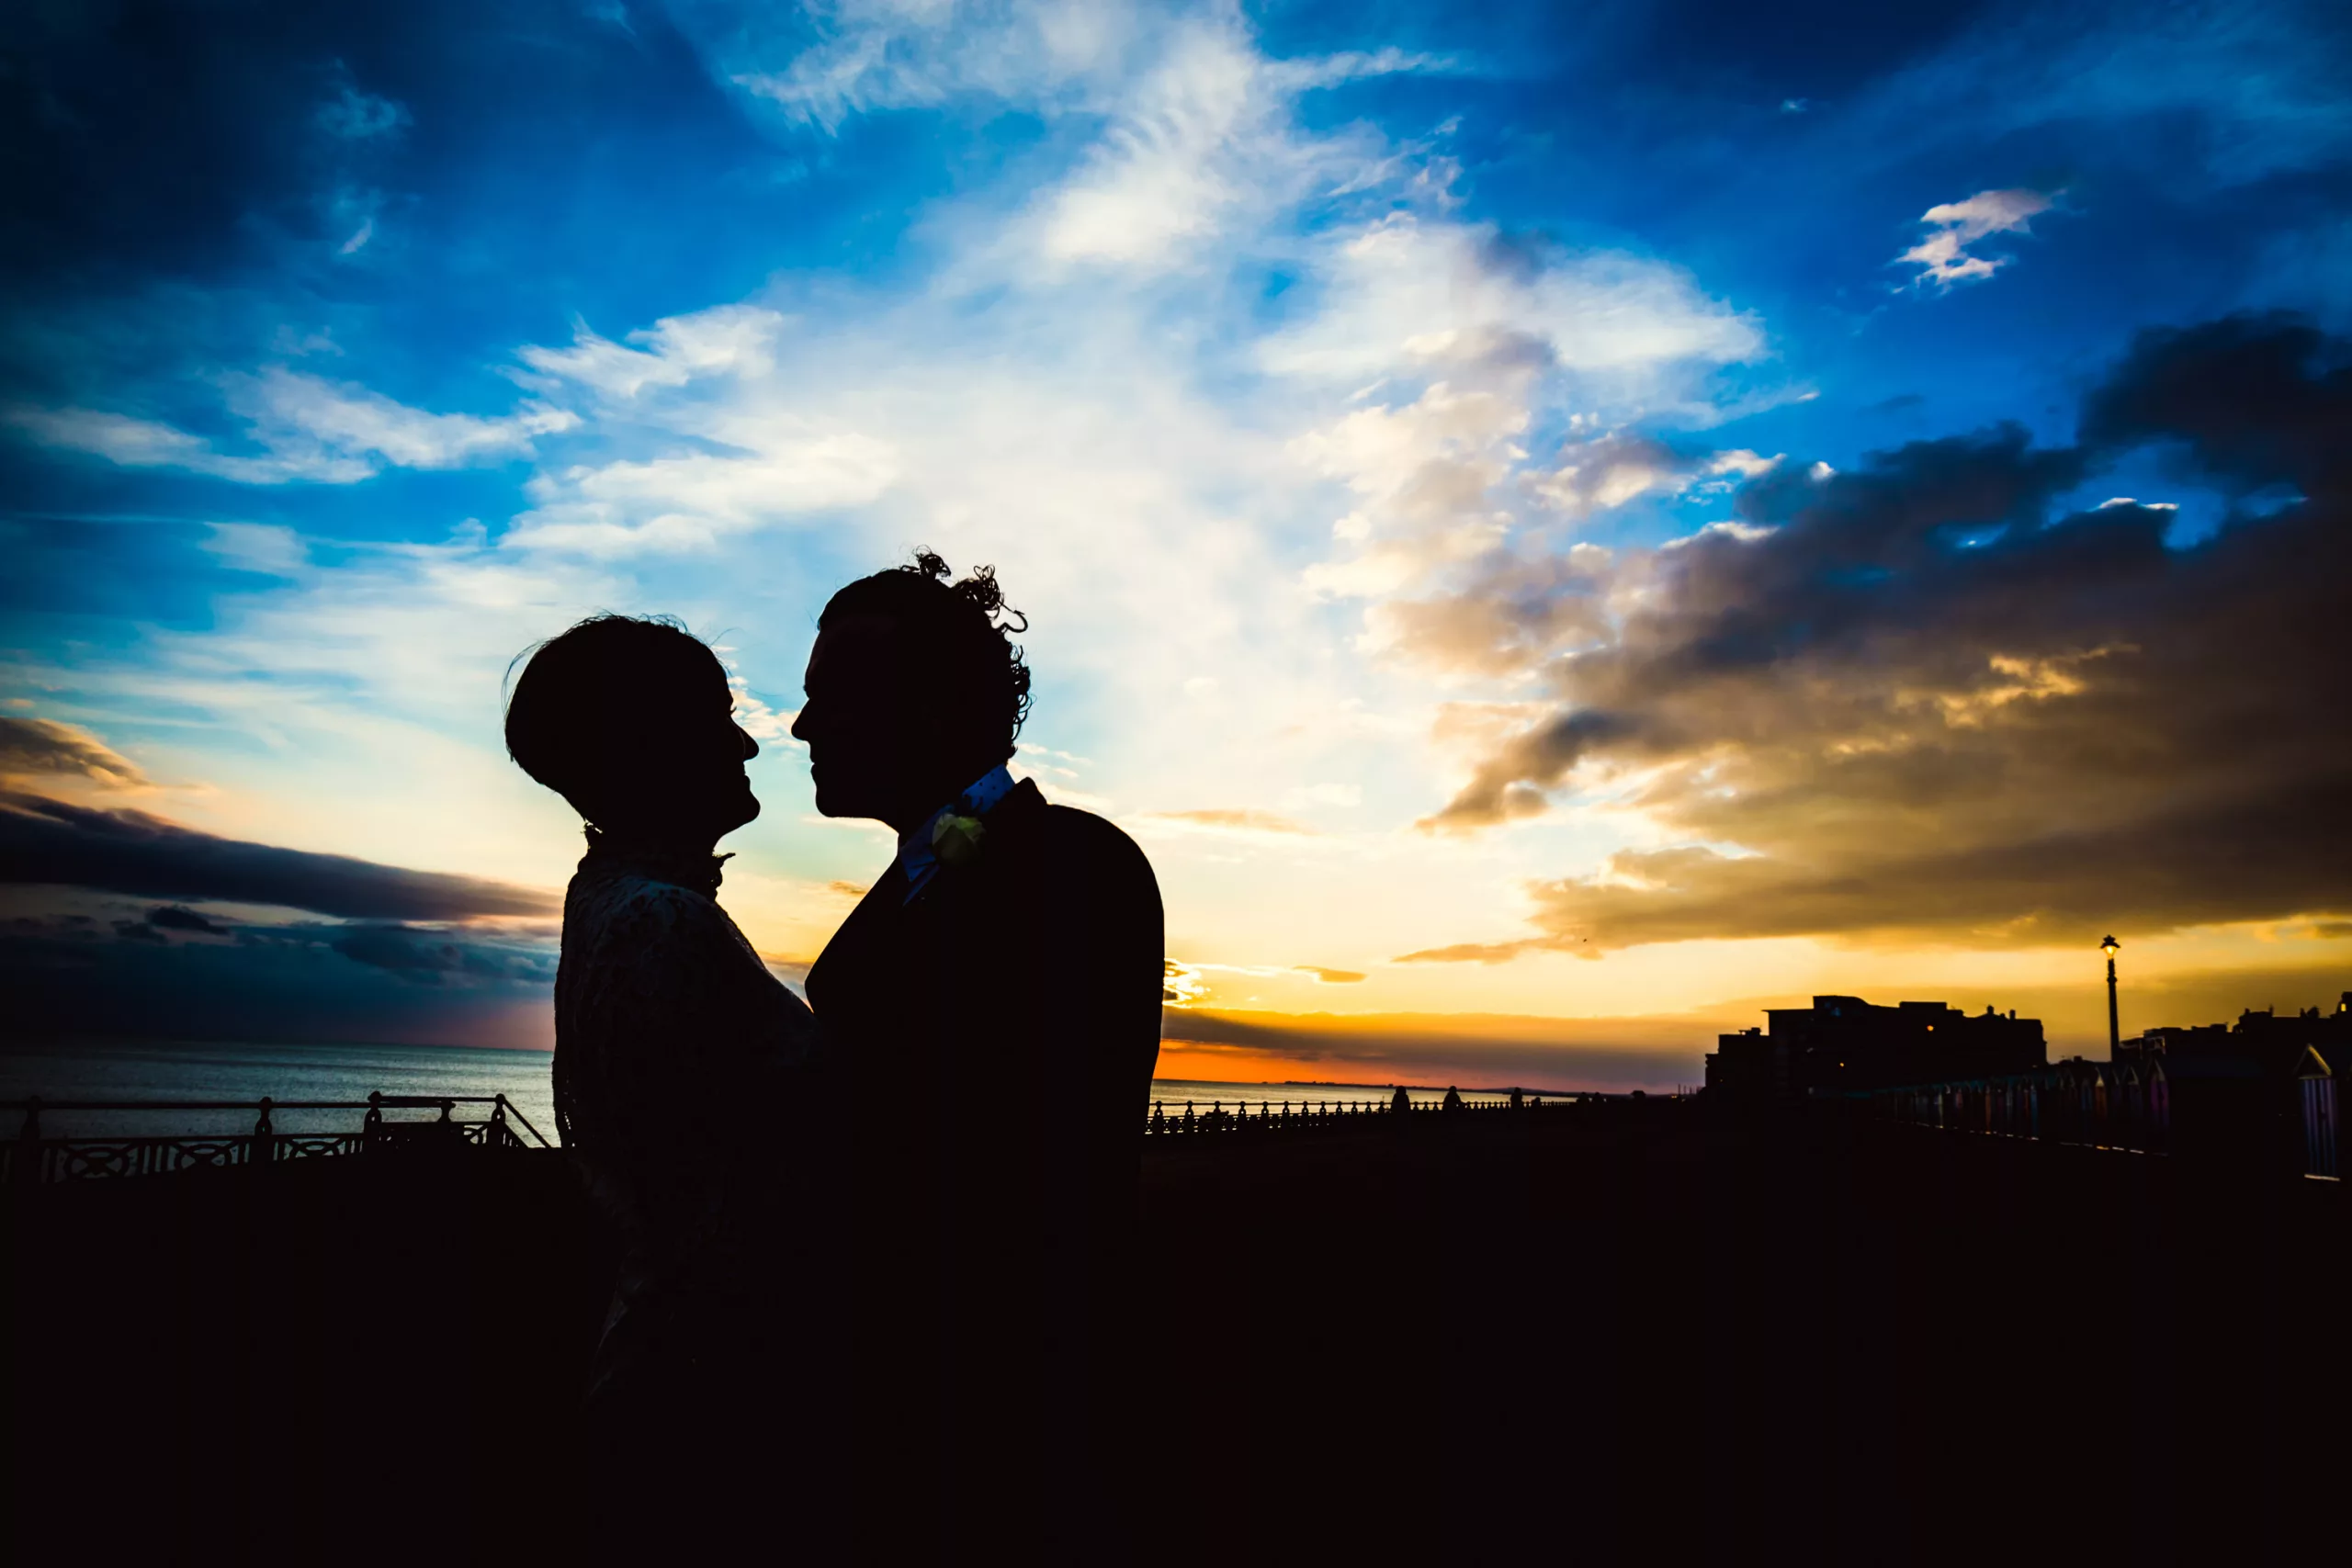
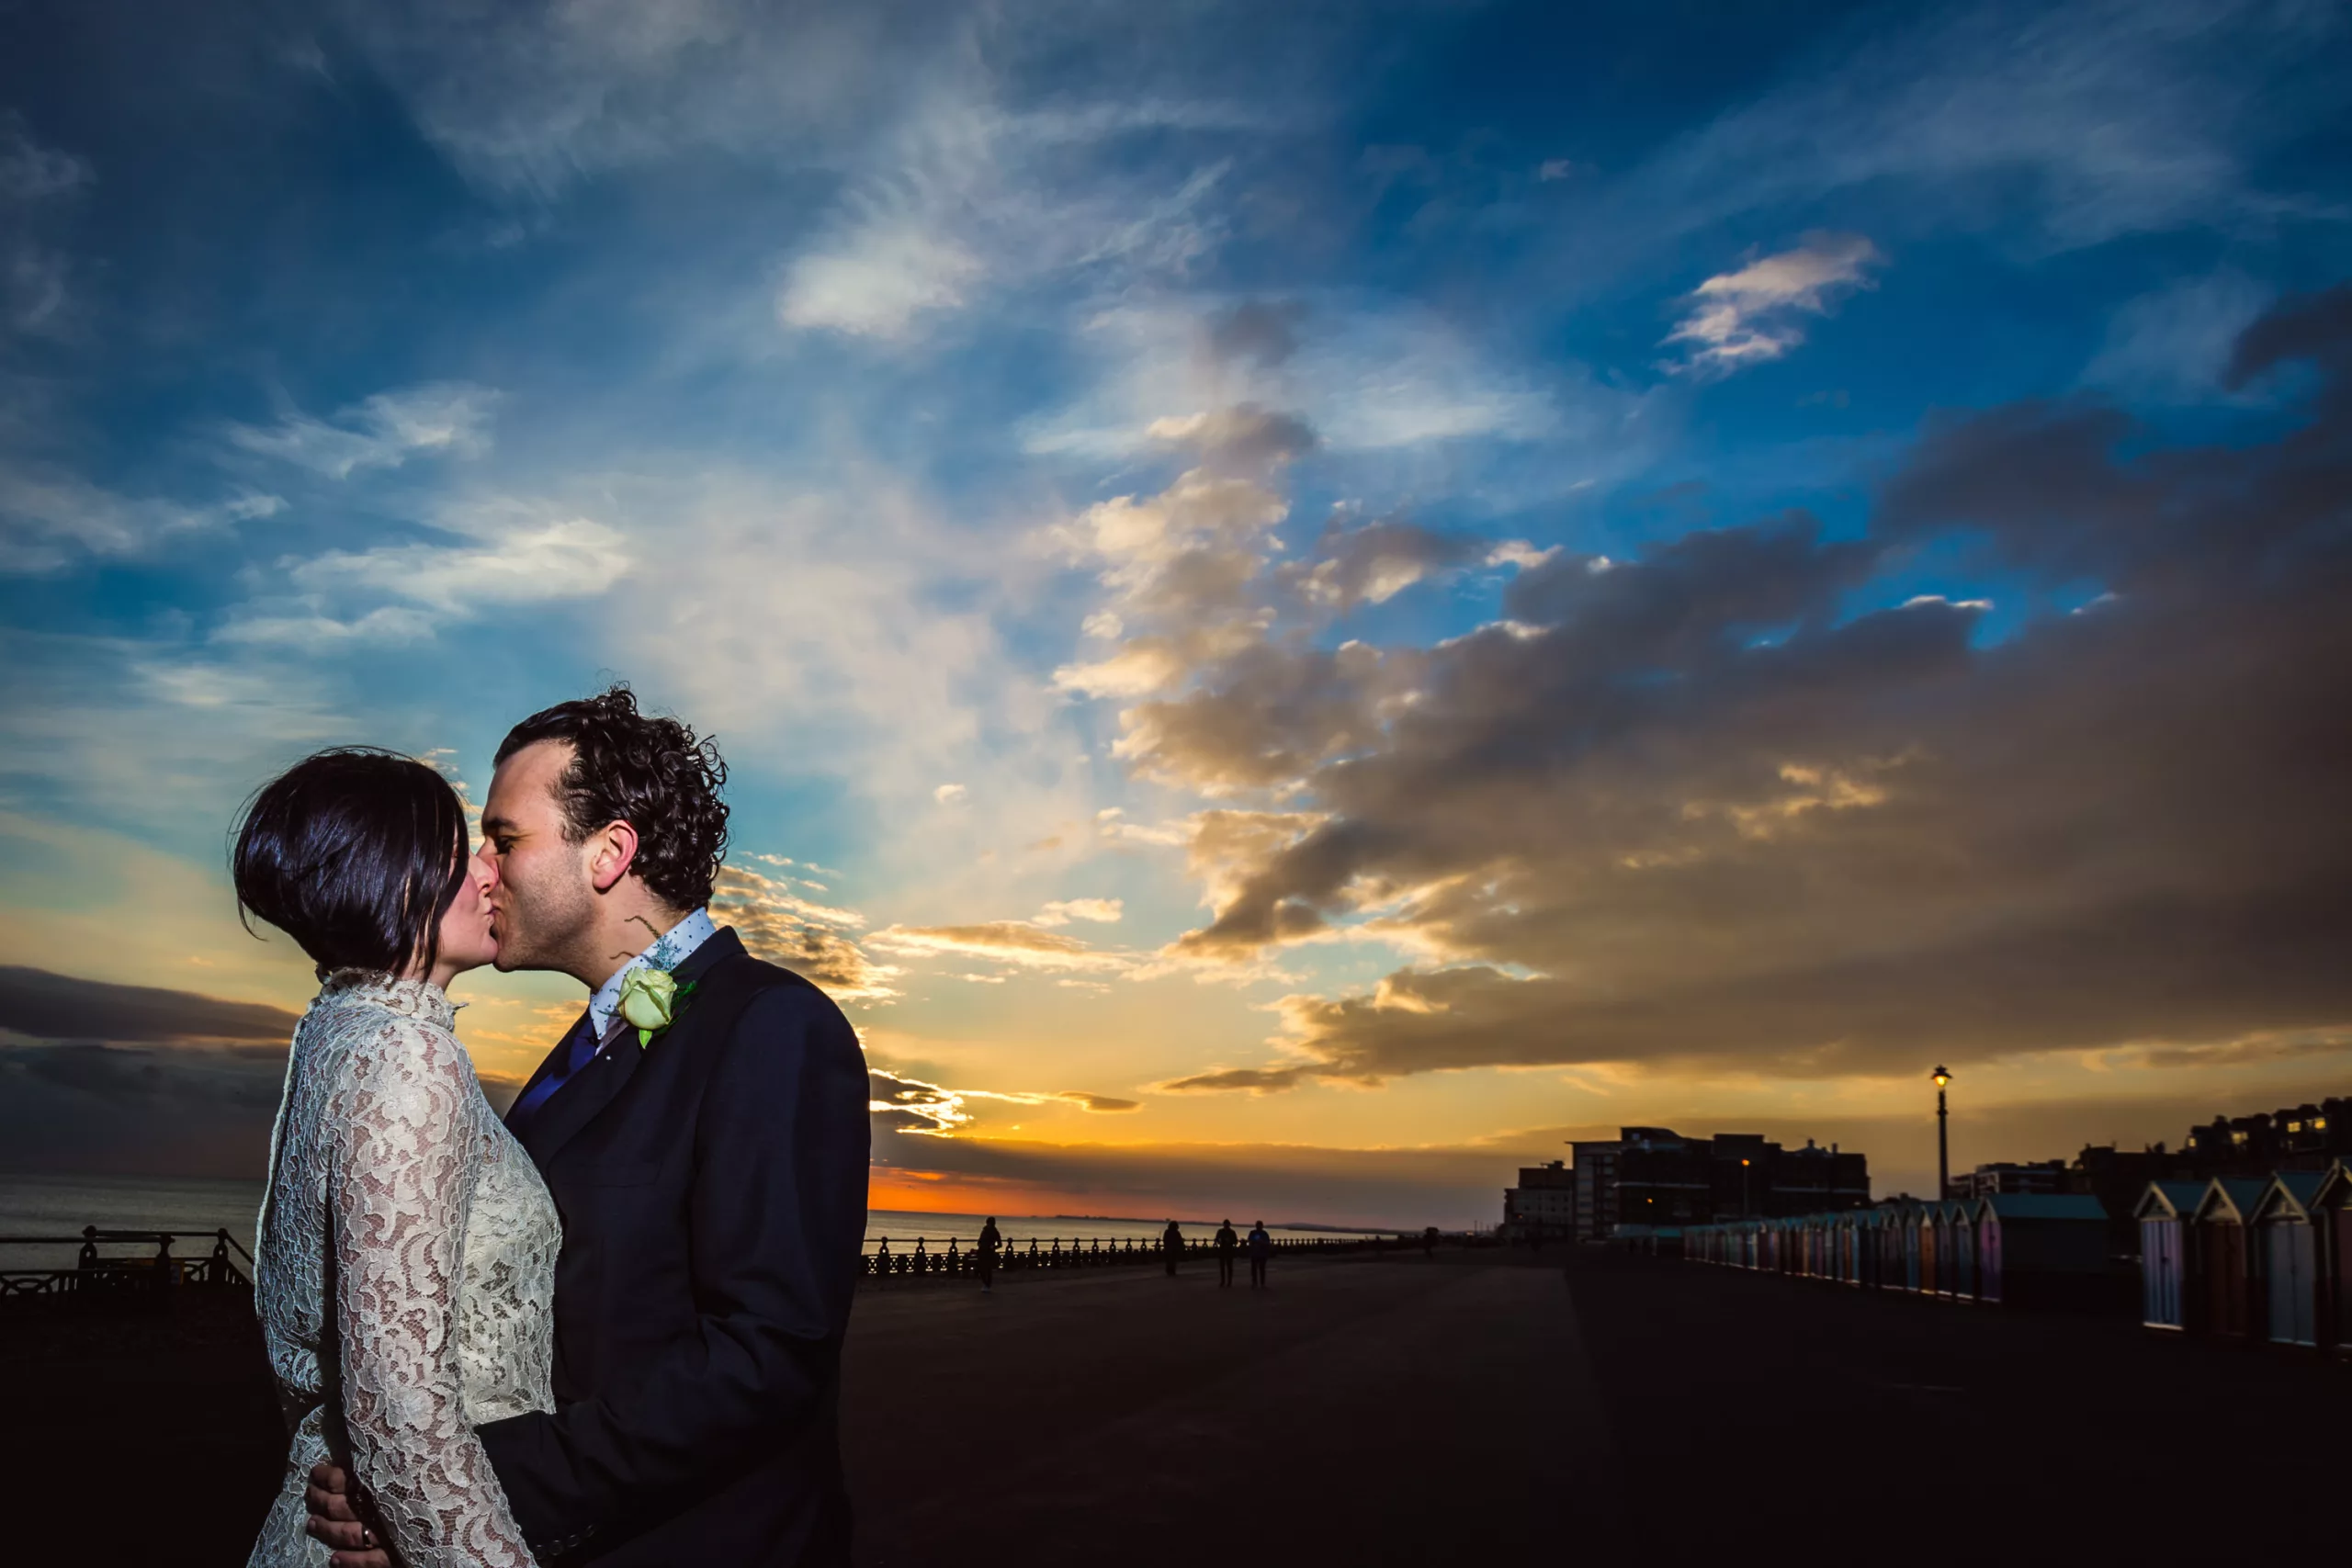
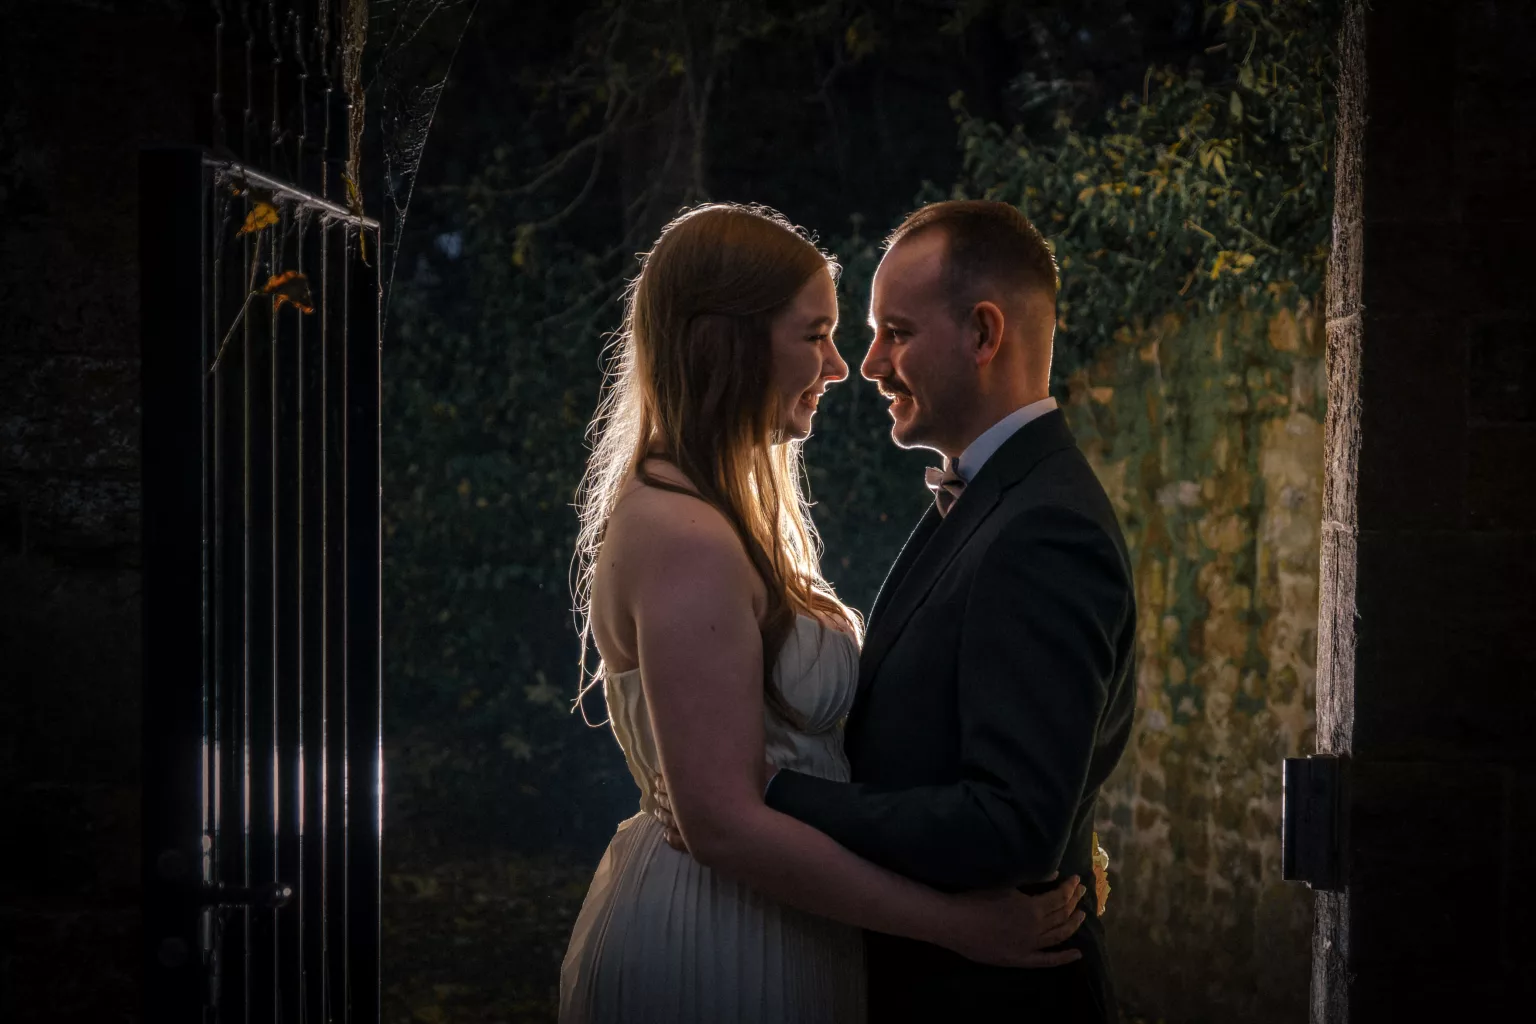
Example 2: Backlight (one light source, behind the subject)
This is something you CAN’T control with natural light only. If there’s any bright light behind the subject, they’ll be either too dark against the background, or the background will be too bright behind them. We can fix some of this in Photoshop but it degrades the image quality.
Here’s an example from a sunset, but the same idea would apply if you had a bright window behind the subject in a dark room.
I wanted to capture all the rich details of the sky behind the couple – but then they were only a silhouette as it was so dark! Sure, I could have selected just them, and brightened them a bit in editing, but it’d have made it very grainy. And if I’d photographed them to look bright enough, then I’d have lost some irrecoverable detail in the sky.
Enter a quick pop of flash to ensure we have both versions! I like both for different reasons, but the point is that my couple had the option to choose which the preferred, and it only took a minute.
Example 3: Not enough natural light
If the weather is generally gloomy and getting dark, or you’re inside in a space that’s not well lit, sometimes there isn’t enough light for the camera to rely on.
Some couples opt for a twilight ceremony, which means it’s at sunset – so by the time they come outside for couple’s portraits, it’s dark! But you still need to deliver something creative… The below example is something you can achieve with a single flash and a radio trigger (some cameras have it built in) or you can use your backup flash to trigger the first one. You do have a backup flash, right…? 🙂
Here’s a wedding portrait taken after a twilight wedding at Steventon House Hotel near Abingdon. All I did was ask an usher to point the flash at the couple from the front – it was March and pretty cold, so we were done in about 5 minutes!
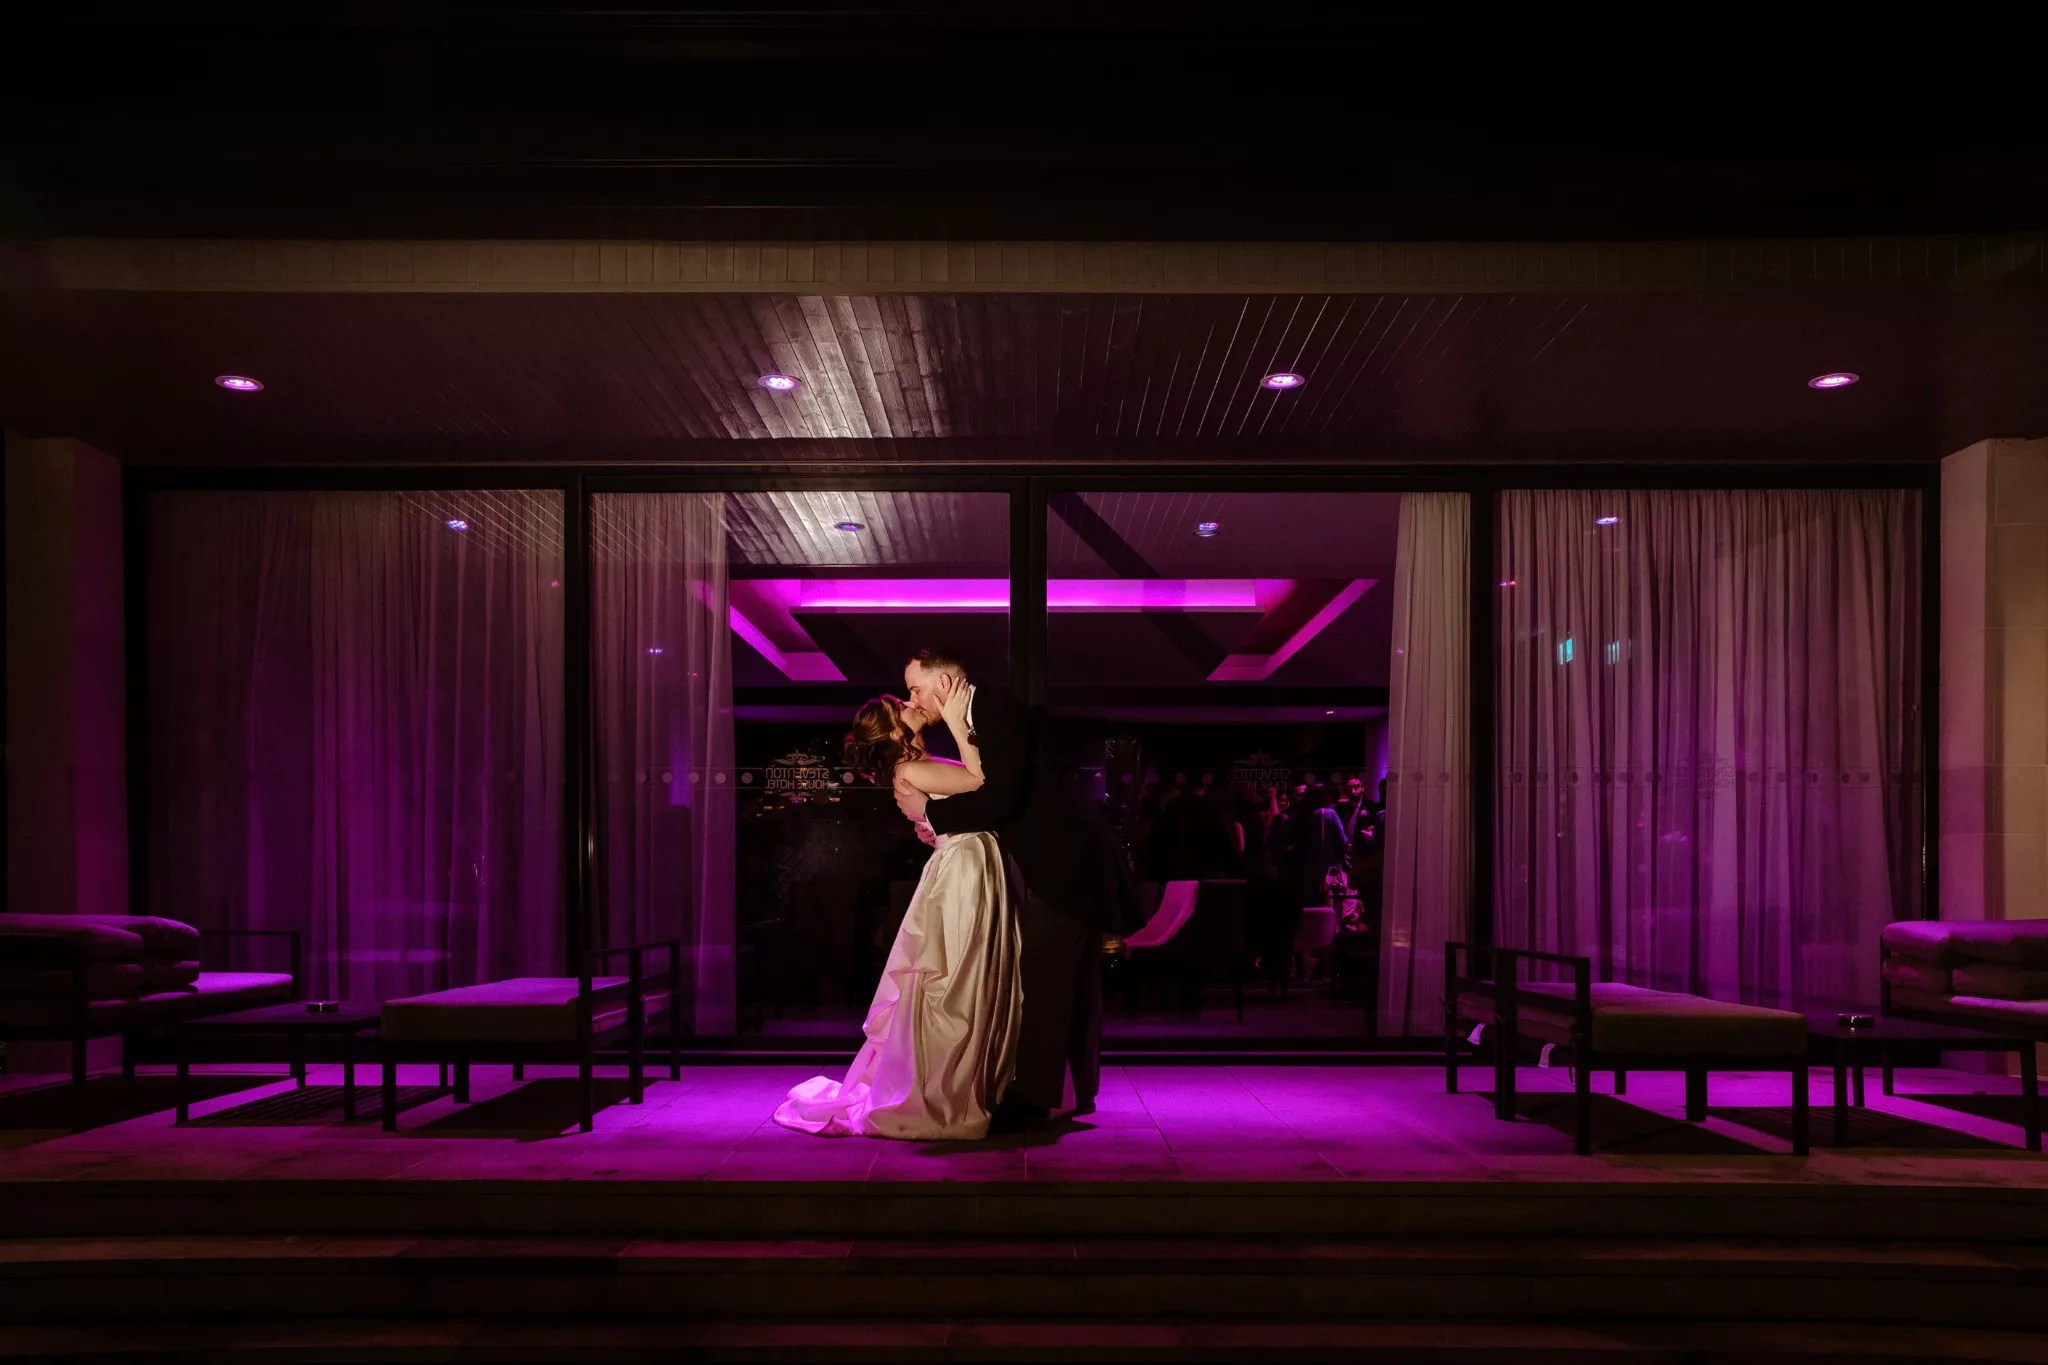
You can see more examples from this wedding here; 99% of the image from the ceremony onwards were taken using one flash with no modifiers!
Example 4: Large groups indoors
To give a more technical example especially for photographers: when photographing large groups in a small space, we need to increase ouraperture setting (the opening of the lens – the smaller it is, the sharper the picture) to ensure everyone in every row is sharp enough. Unfortunately, when we do that, we aren’t letting as much light into the lens, so we need to change our other settings to compensate.
The problem starts when you’re already at the “maximum” allowable settings for the other two settings you can control! One of those is ISO speed: the higher you go, the grainier and less sharp the photo will be. The other is shutter speed – going too low will make everyone blurry due to camera shake!
We can either end up with very dark, grainy photos; no photos at all; or we can embrace flash and get better results!
Take this example of a company group photo I had to take. The client was specific that this is where they wanted the photos taken, so the option of asking everyone to move to a brighter area wasn’t possible – and it often isn’t at weddings either. I was maxed out on aperture, and had to put my camera on a tripod because my shutter speed was so low – but the background had to be bright enough and I couldn’t light that because I didn’t have more than 3 flashes!
Again, compare how the natural scene looked vs the flash version. Sure, the natural one is usable but we can do way better with the flash.


I used three flashes for this one but even if I had just used one, pointing straight at them or bounced off the ceiling, the result would have been better than not using flash at all.
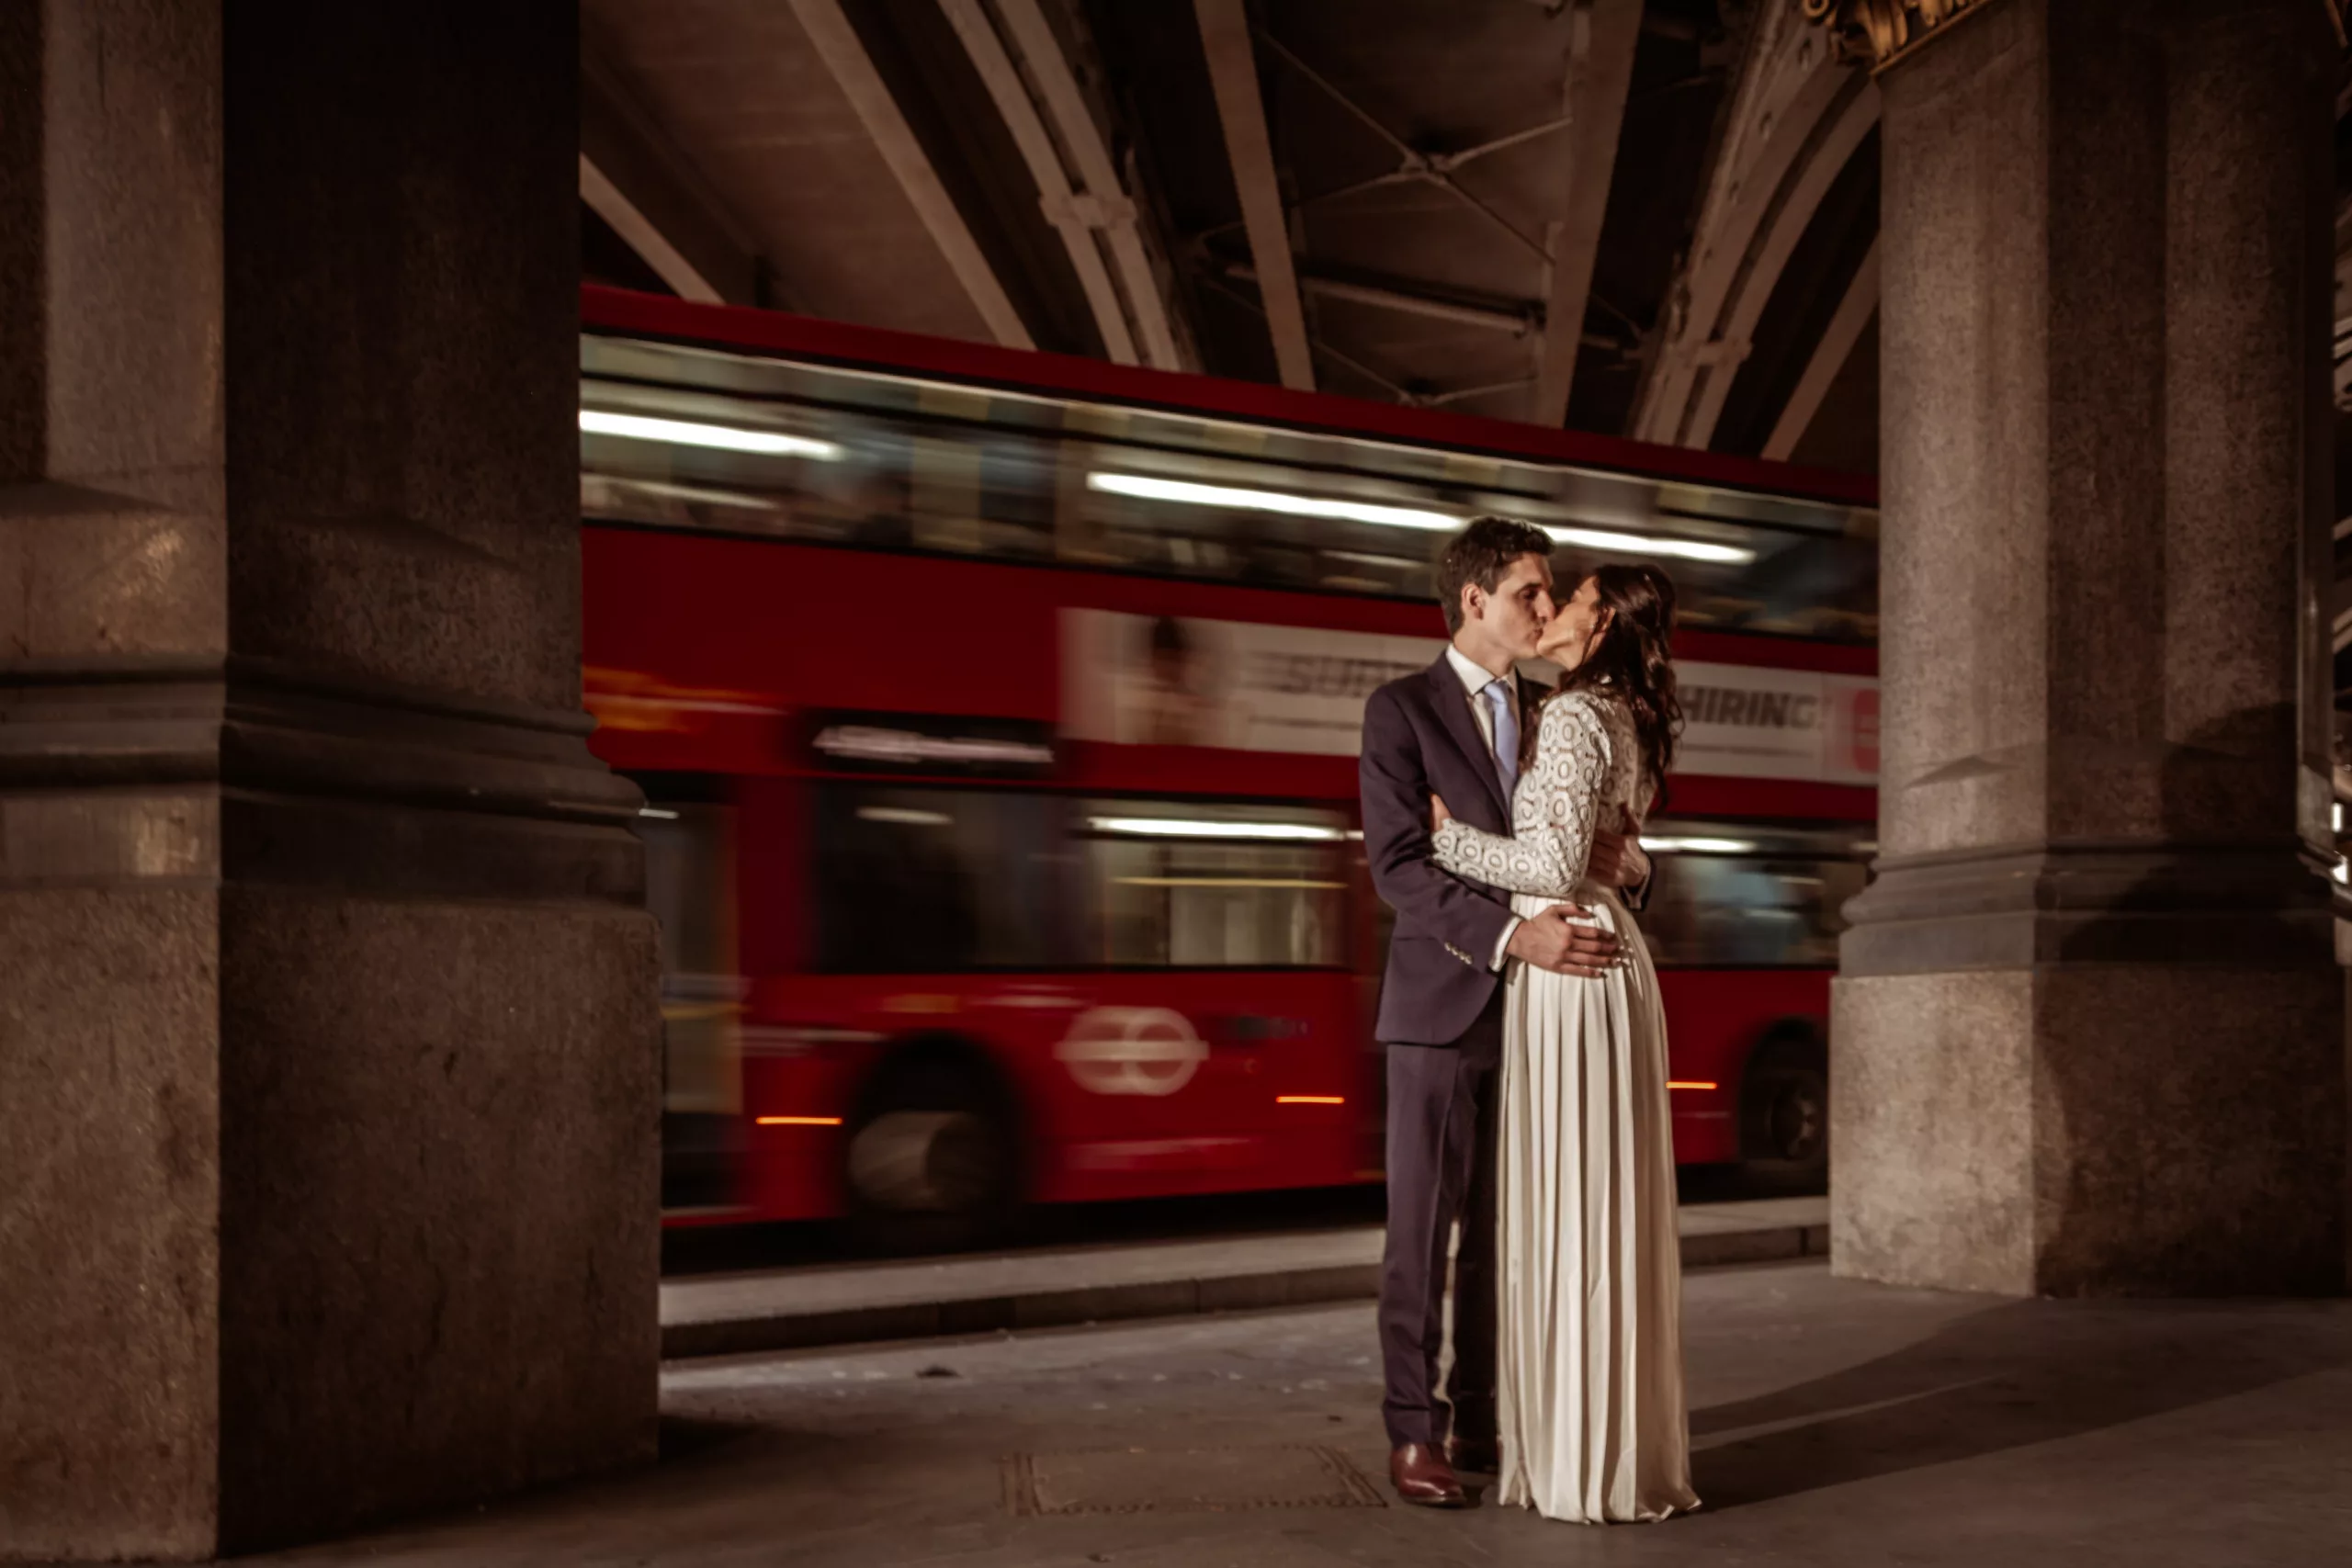
Example 5: Motion blur effect
You can technically get this if your couple stay very still, but it’s not that easy and flash makes it a breeze. Lower your shutter speed to around 1/4, set up your flash and point it at the couple, and it’ll freeze their motion perfectly, while you capture a moving object behind them that’ll end up blurred, like this London bus behind the kissing couple.
How do I use my flash on camera to get these results?
You can use a flash both on your camera, and taking it off, like I did for the twilight wedding example above. But if you’re a bit scared of more techy stuff like syncing the flash with a trigger, then just start with it on your camera – you’ll still get lots of mileage out of that alone!
What’s the best speedlight flash for weddings and events?
Important: do NOT use the inbuild popup flash on your camera – it won’t have the controls you’ll need! Use a separate hotshoe mounted flash. I use a Godox V860iii and a Godox V1 round head for this sort of work. They both have TTL functionality which you’ll need, and have interchangeable batteries and chargers which is handy for organisation!
With flash, the thing we need to always keep in mind is recycle time. That’s the time it needs to recharge the lightbulb and flash again at the same power as before. Make sure you don’t push the flash to always use its full power, because it’ll take longer to recycle and it’ll run out of battery much faster.
Choose a speedlight with a rechargeable lithium battery, instead of one that takes AA batteries. For boring technical reasons, the lithium ones will provide more consistent recycle times as your battery level decreases over the day.
What should my shutter speed be when using flash on camera?
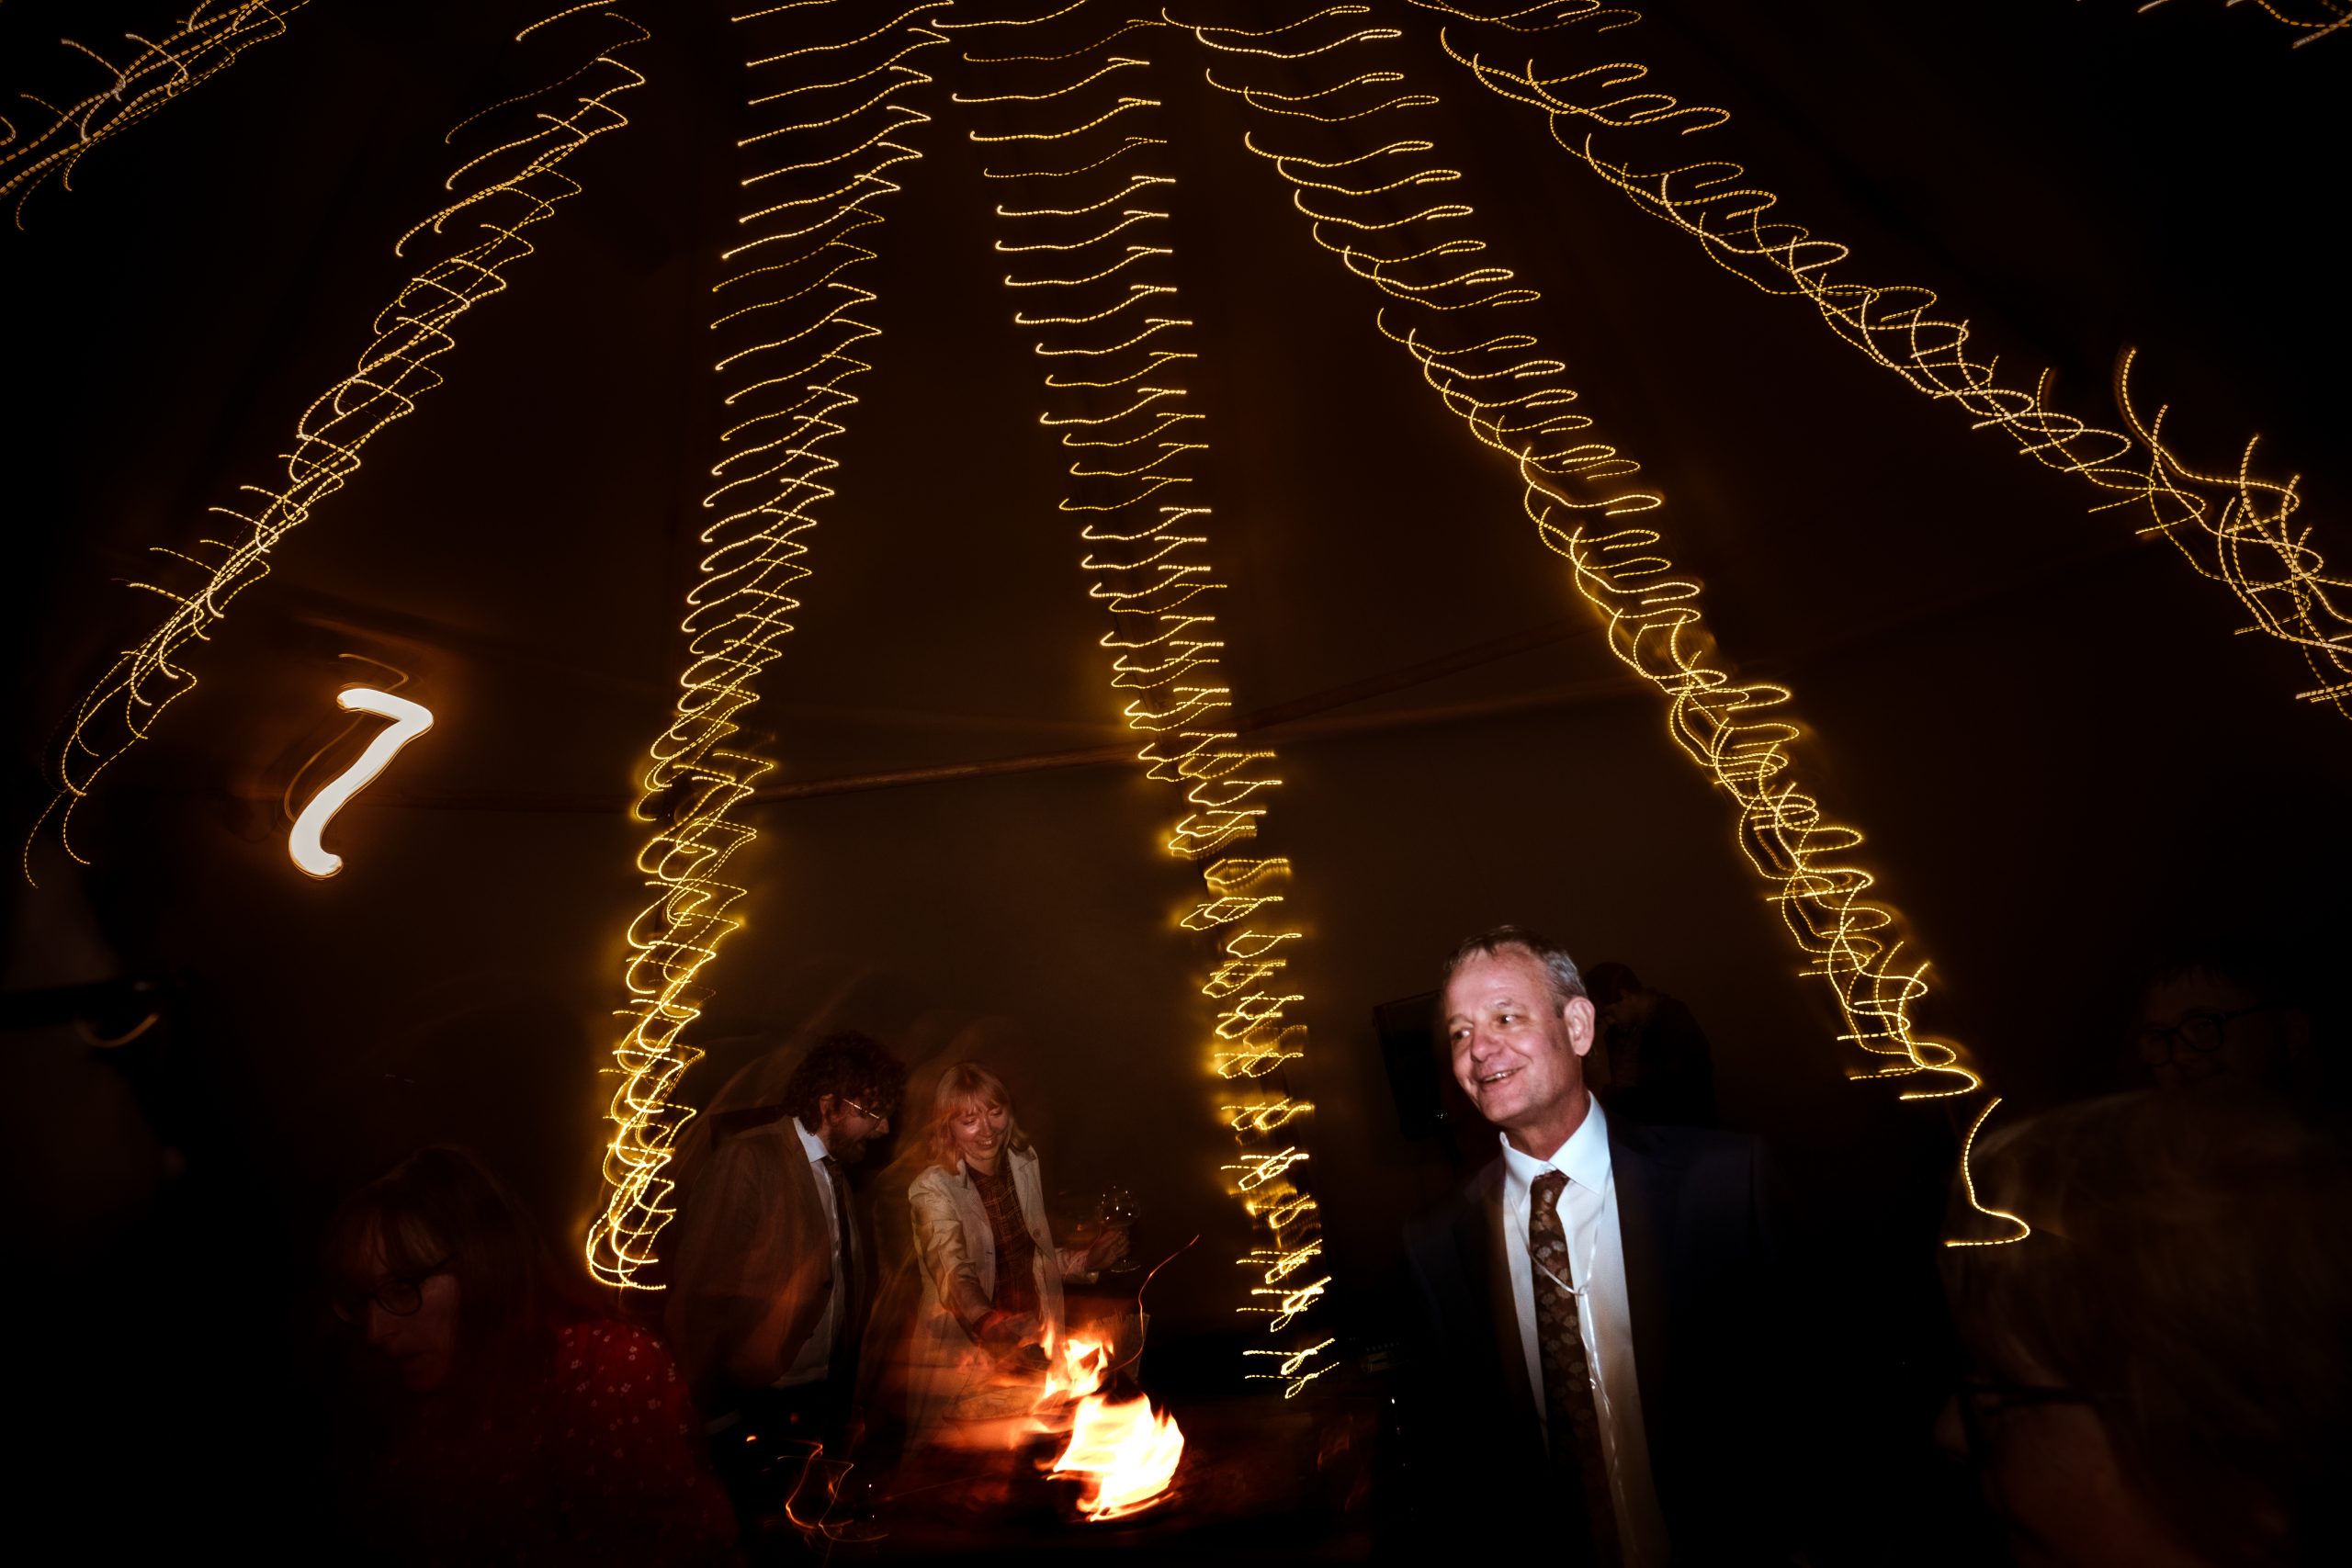
Shutter speed doesn’t affect your flash beyond the fact that if you go above 1/250, you’ll get a black screen. There’s a technical explanation but it doesn’t really matter for our purposes – just keep it below 1/250. I’m normally on 1/200, myself. Shutter speed will affect only your ambient exposure (the natural light around you). So if there’s nice lighting – try to preserve some of it. You can create fun light trails too, with a very low shutter speed of 1/4 – 1/8 – we all like to play a bit after getting our “safe” shots, right?
What aperture should I use for on-camera flash?
The word “aperture” means “opening” (of the lens to let in light). The larger my aperture is, the more light from my flash can get into the lens, so my flash doesn’t have to work so hard and put out so much light to balance the exposure!
This’ll let it recycle faster and means I can take more pictures in bursts. Win!
I normally leave it on f2.8 – f4 for general work and f5.6 – f10 for groups depending on size. Just consider what depth of field you need as a minimum for the number of people in your picture, and go from there.
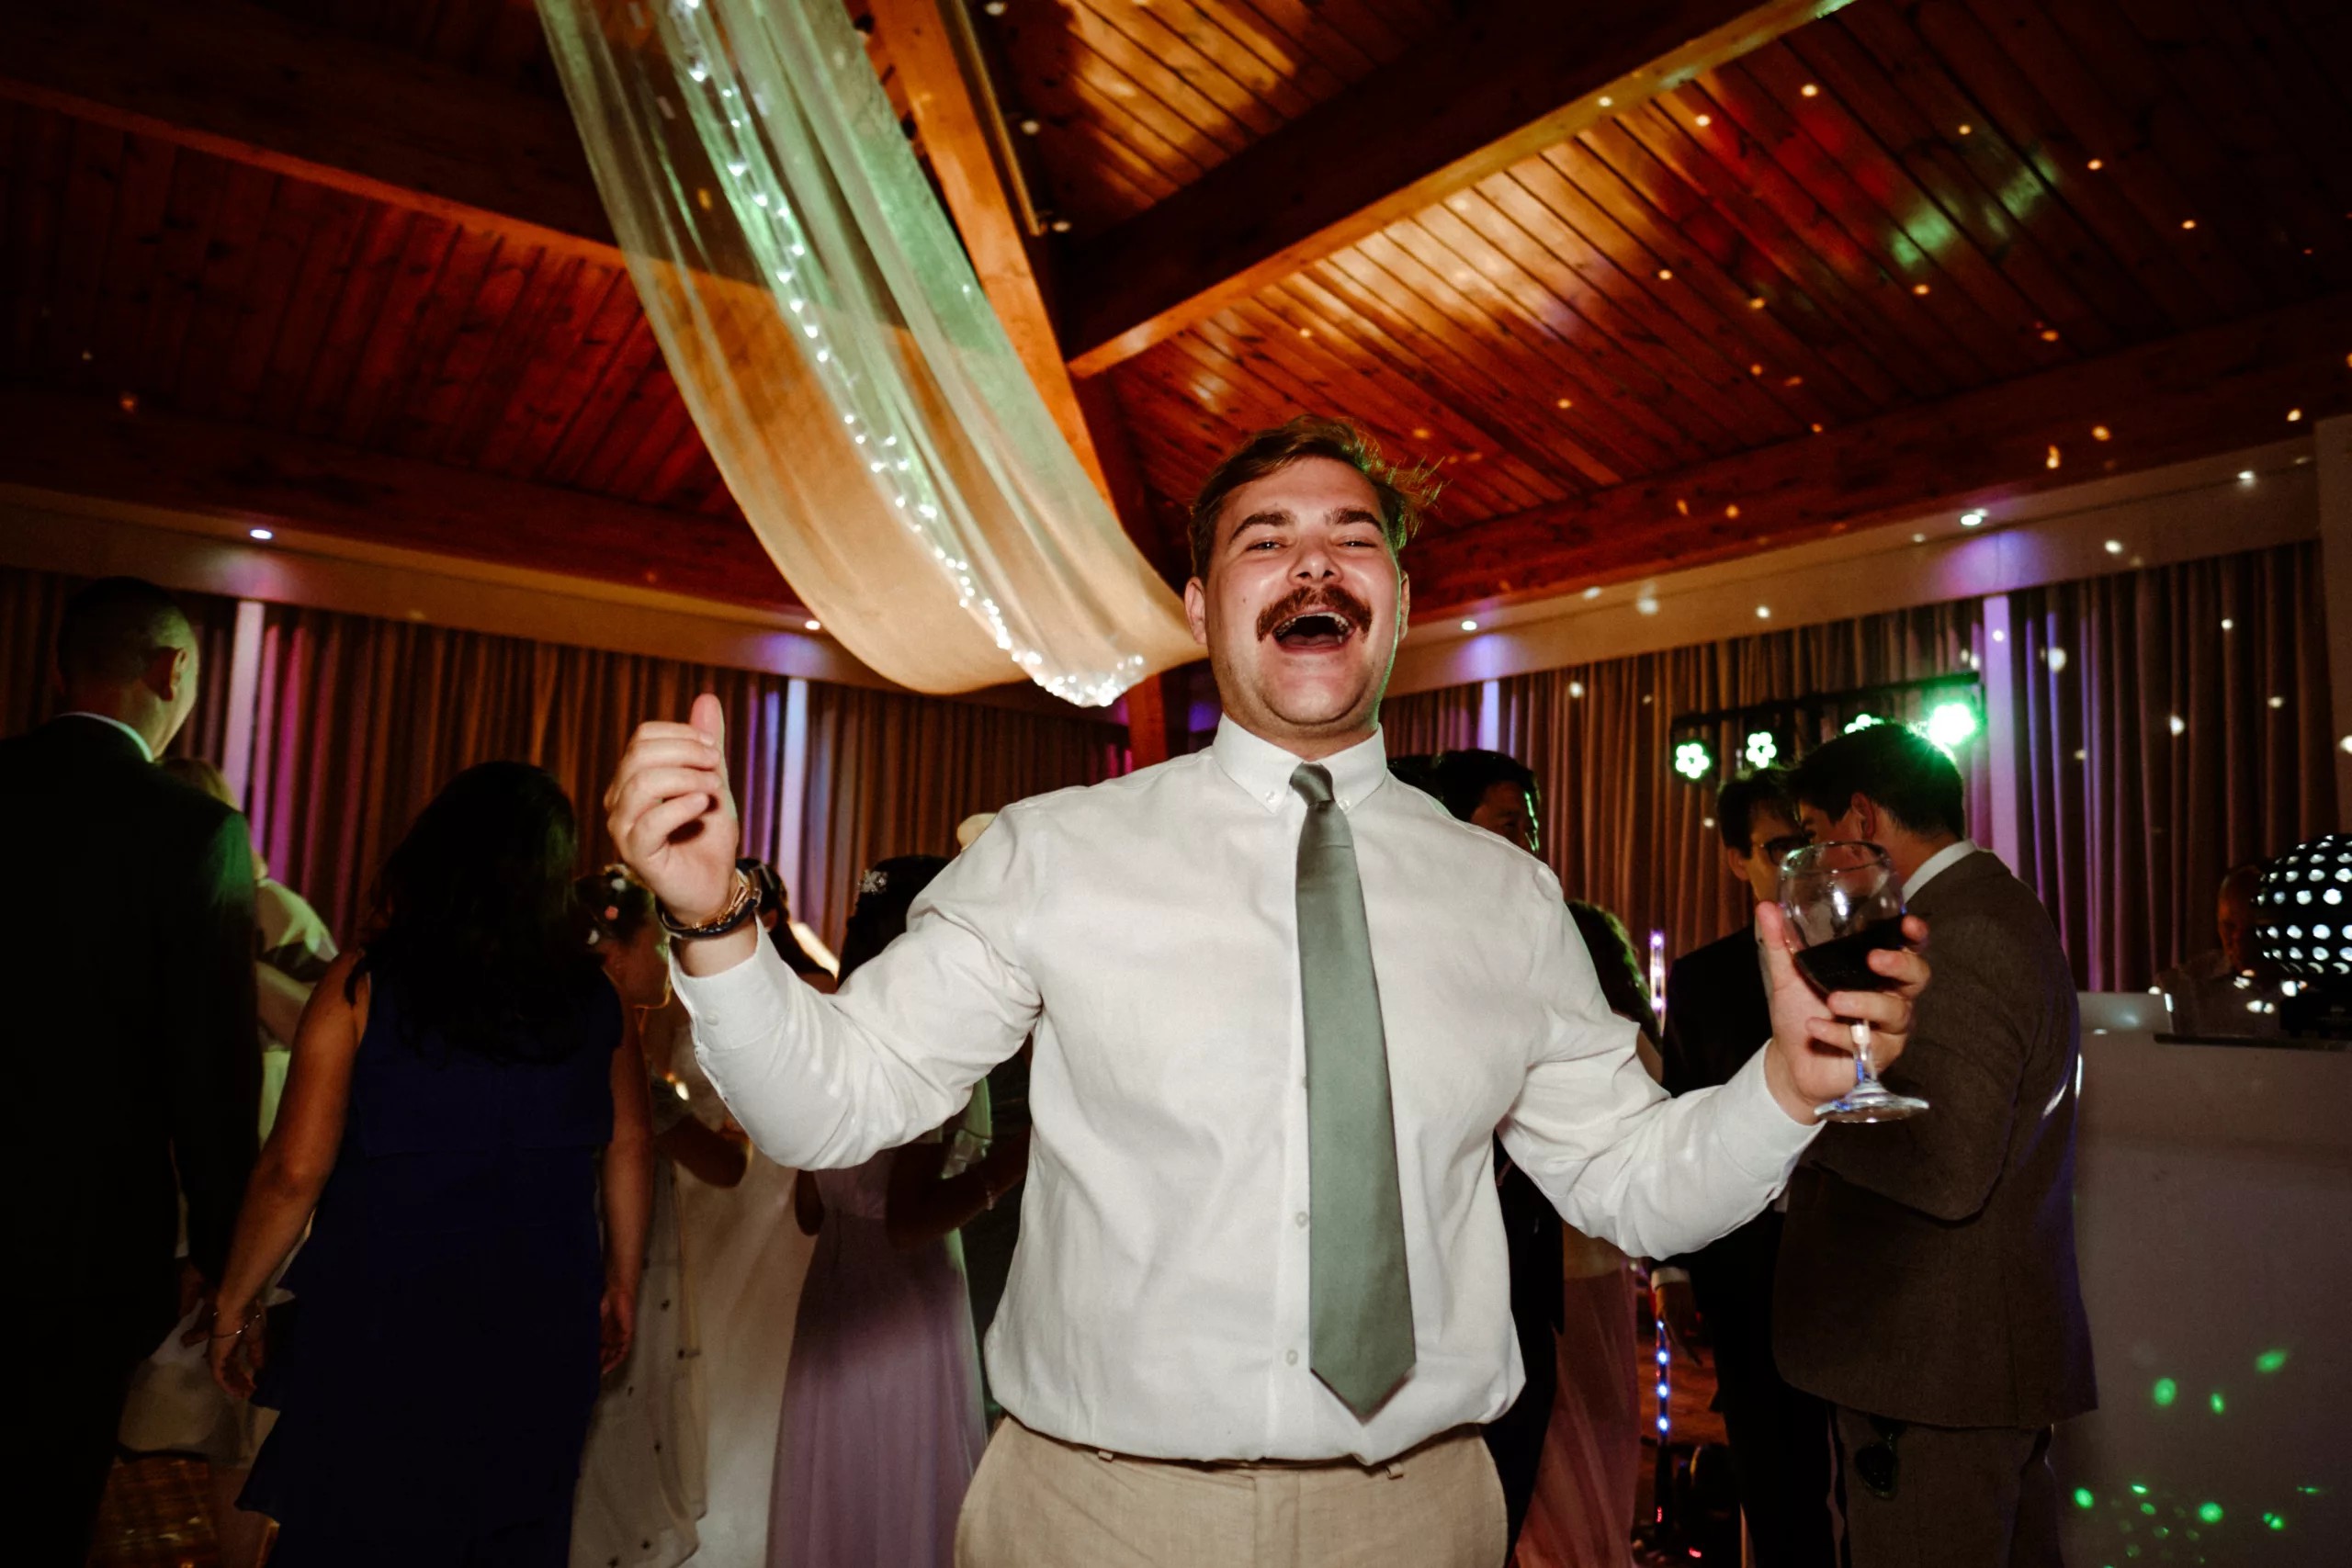
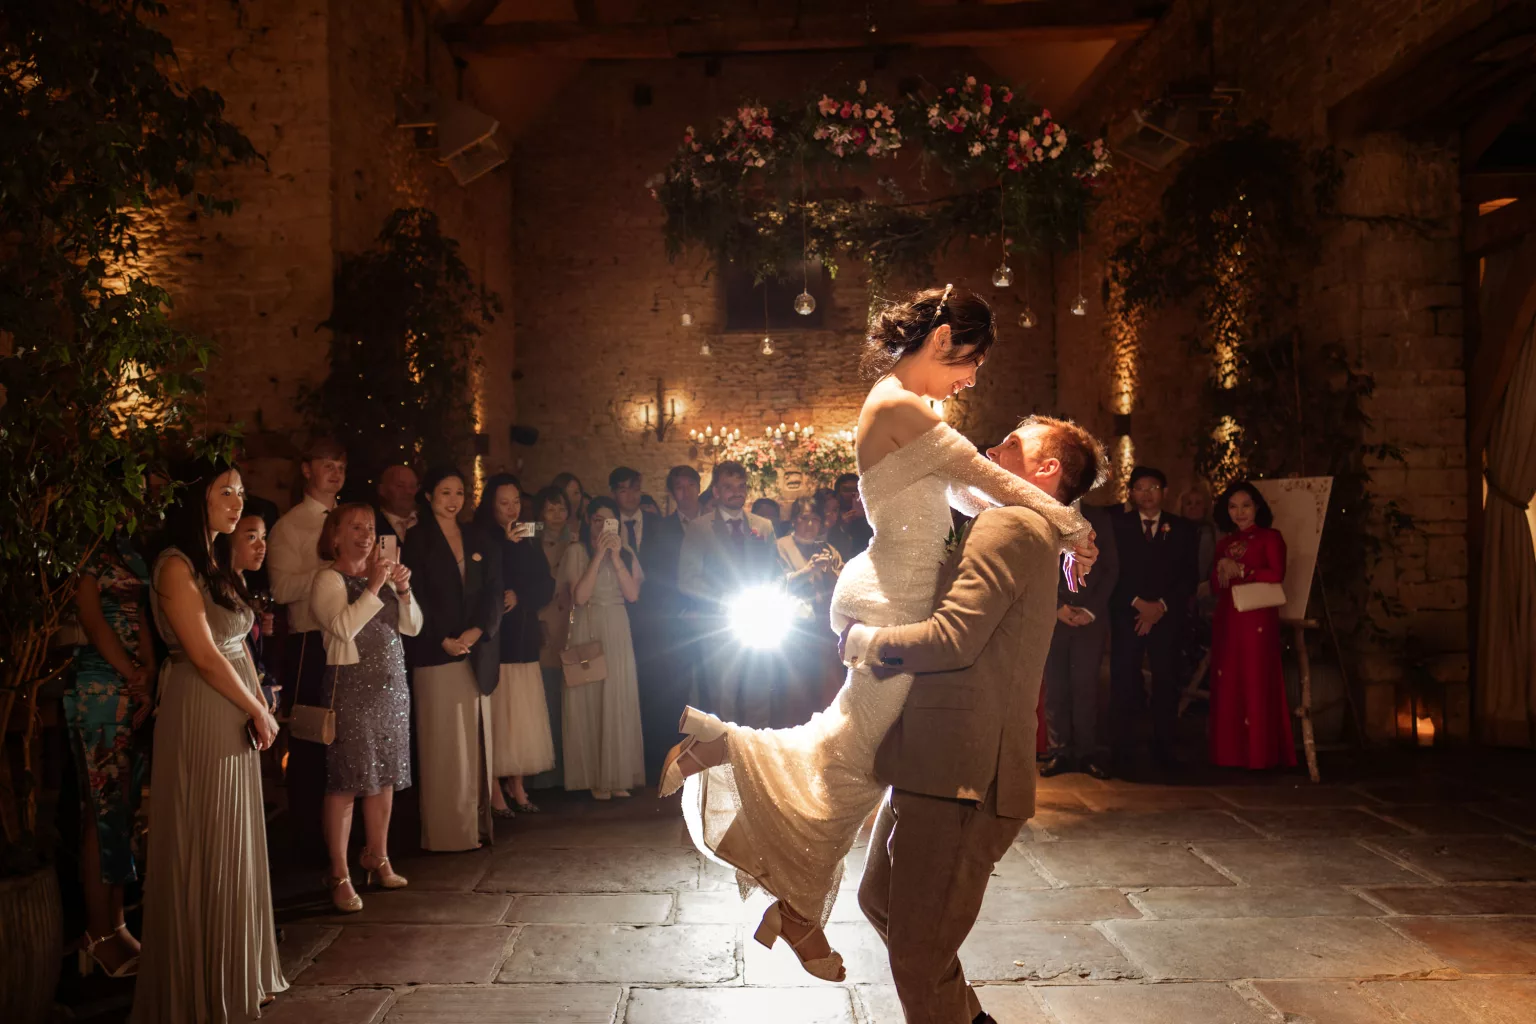
For dancing/party photos like the below, people usually make so many weird faces in photos that I have to shoot loads in bursts to get one usable one! Recycle time is paramount.
What ISO to use for flash on camera?
This one’s mostly personal preference, depending on your tolerance of grainy photos, your level of pixel peeping (or general eyesight 😂) and, again, how important the recycle time is to you and your way of shooting.
I like not to have to think about recycle time and miss a potentially awesome moment, so if it’s dark inside and the flash is my main light source, I crank my ISO to 1000 – 3200 depending on how dark it is around me. Just like for aperture, this means the camera is more sensitive to light (both from the flash and ambient) so the flash doesn’t have to work so hard. It’d be a shame to miss nice moments because I’m worried about a bit more grain… but that’s just me. Imagine if I’d missed the kiss below because my flash was recycling!
If the flash is only filling in the light a bit, for example if you’re outside and just want a bit more “pop”, you can leave the ISO lower at a reasonable level of 400ish to still preserve the flash battery as much as possible.
Step by step on camera flash settings for beginners:
- Set your flash to TTL mode and your camera to manual.
- Set your shutter speed to 1/200, ISO speed to 800 and aperture to f4 – these will be good starting points that you can tweak as you go.
- Turn your flash up and about 45 degrees to your left, so it lights the ceiling above and to the left of you. It’ll bounce off the ceiling for softer, more flattering light. OR you can just point it at people for a direct editorial style which is very popular these days. Personally I think the bounce method is nicer and I only use direct flash if there’s nothing to bounce off, like outside or in a room with dark ceilings.
- Take photos!
Review the results and change what you need to. If your background is looking too dark, decrease your shutter speed. If you need more light overall, either open your aperture or increase ISO.
More flash techniques and settings to try if you’re feeling confident
Off camera flash & manual settings
This is mostly the same principles as on camera in terms of settings, but you have more flexibility around the direction of the light and where you bounce it from. Remember, you’ll need a radio trigger or a backup flash that can sync with other flashes (most modern ones can) so your camera can talk to the flash even if it’s far away.
You can then create these sort of backlit portraits at night that are so easy! Just put the flash on the ground, with the flash head pointing up towards the couple’s midsection. You can switch your flash from TTL to Manual to add more control to how bright it is, if you don’t like what the TTL is doing!
Flash exposure compensation
Sometimes, the TTL on your flash is just a bit too bright for your liking (or too dark). You want it to match the ambient light a bit better. What do you do? You can either put it on Manual if you have time and are doing posed photos, like above… but when you’re walking around doing candids, this won’t be possible because every angle will need a different level of light!
You can set the flash exposure compensation in this case! So the base level of flash power will still be determined automatically through TTL, but it then also lowers it by your chosen amount, relative to the setting it calculates.
You can set this up either on your flash using the buttons, or on many cameras you can also do it within your camera settings in the flash section of the menus. Personally I often keep my flash exposure compensation at -1/3 because I find it’s just a bit safer to ensure it doesn’t blow out any highlights, especially when there’s a bride in the shot wearing a very shiny white dress.
Gelling your flash
By default, flash light is similar in warmth to sunlight, so roughly neutral – not too cold, not too warm.
But sometimes you’re in a venue with loads of wood beams/furniture, or a wood panelled room, or have very warm ambient light like candles or older type (non-LED) lightbulbs in lamps. The warmer the light, the more orange it’ll look. The colder it is, the bluer.
You’ll run into the problem where your flash colour balance is too cold compared to the ambient. The parts it lights, which is usually people, will look too blue compared to the background so everyone will look very sickly! Or the flash parts will look fine but the background is so warm in comparison that it’s like a raging inferno behind them. Oh no! Flash gels to the rescue. They’re little plastic pieces you can tape over the flash to make its light also warmer or cooler to match the background better. Saves TONS of time in editing, so if you’re a regular at barns or such, pick up a few and experiment!
Summary
Flash gives you control, consistency, and creative freedom: it can tidy up messy indoor lighting, balance subjects against bright skies, and rescue dark group shots without sacrificing quality. The trick isn’t avoiding flash… it’s learning to use it well, step by step and small bits at a time.
I hope this article has helped you gain the confidence to give flash a go if you’re a photographer; and if you’re a prospective client, I hope you’ll now indulge your photographer more if they suggest using flash for certain moments of your special day!
Once you understand how shutter speed, aperture, and ISO work together, flash stops feeling technical and starts feeling like the fun creative tool it truly is.